Action Plan on Digital Technology
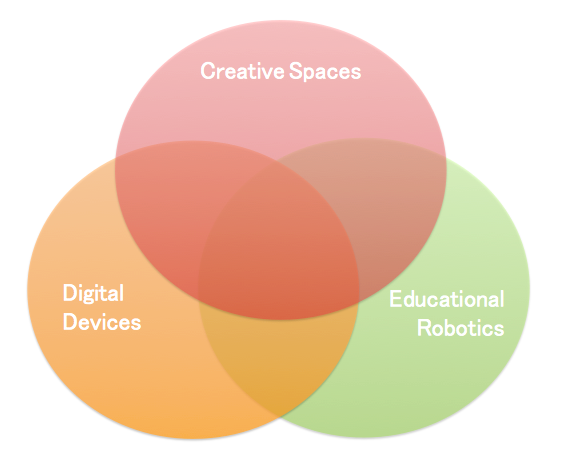
The Quebec Ministry of Education recently launched its Digital Action Plan ( Go to site![]() ). The scope of the action plan is wide-ranging and affects the entire Quebec education system. One of the featured measures under the plan is the Digital Technology Combos which has provided funding to bring many new technologies into our schools under three categories: Creative Spaces/Makerspaces, Educational Robotics, and Digital Devices. We have created this resource to help you navigate these new technologies and support their use in the classroom.
). The scope of the action plan is wide-ranging and affects the entire Quebec education system. One of the featured measures under the plan is the Digital Technology Combos which has provided funding to bring many new technologies into our schools under three categories: Creative Spaces/Makerspaces, Educational Robotics, and Digital Devices. We have created this resource to help you navigate these new technologies and support their use in the classroom.
For more information on makerspaces, coding, and devices as well as professional development opportunities, please visit our Open Creative Spaces site.
The provincial RÉCIT network and CADRE21 have developed training materials for each of the digital combos in French.
( Go to site![]() )
)
Digital Competency Framework: The aim of this framework is to develop digital competency, which is defined as a set of skills necessary for the confident, critical, and creative use of digital technologies to achieve objectives with regard to learning. Download 
Digital Competency Framework compilation of resources - Go to site![]()
Digital Competency Framework animated wheel elements and examples - Go to site![]()
Digital Technology Combos Introductory Videos: Intro, Digital Devices, Robotics, and Creative Spaces
Introduction to Creative Spaces
What is a Creative Space?
A creative space is a space in which people come together to make things - be it students, educators, parents, or community members. These spaces are informed and inspired by the Maker movement, by Art Hives, and by the act of creation that makes us human.
A creative space brings together head, heart, and hands.
A creative space is a human space where we collaborate with others to design, create, and build using physical materials and digital devices. The focus on the process of making allows us to make deep connections between concepts, to solve real-world problems, to develop perseverance, or simply to create serendipitously.
Pedagogical Approaches in Creative Spaces
Creative spaces can foster student engagement through active learning with high and low-tech materials. This can include, but is not limited to:
- programming ( go to page ![]() )
)
- using microcontrollers such as the Makey Makey and micro:bit ( go to page ![]() )
)
- robotics ( go to page ![]() )
)
- constructing with cardboard (see "Materials in Creative Spaces" below)
- working with e-textiles and paper circuits ( go to page ![]() ), as well as,
), as well as,
- designing and creating simple machines.
But more importantly, there is an emphasis on the process of design, creation and collaboration, and the maker mindset.
In addition, works-in-progress, documentation using photos and videos, and final productions created in the space can be shared with others in the community and the world through journals, websites, blogs, and through social media. It’s not really about the product, but about the learning that is happening throughout the process and the reflection on the learning, for both the teachers and the students.
A learning environment that is process-oriented and student-centred
Creative spaces can be ideal settings to promote diversity. There is no one-size-fits-all; multimodal ways of learning and representing knowledge are encouraged through a variety of open-ended learning opportunities, where all learners can focus on their own interests, develop their abilities, and hone their strengths. Students who struggle academically can be successful through experiential learning activities, while those who thrive academically may face obstacles when there isn’t an obvious path to accomplish a challenge. This provides opportunities for growth for all and engages students in their learning. “Practice makes perfect,” best describes a maker mindset, where abilities can be developed, improved, and expanded upon throughout life. This open mindset champions risk-taking and failure which helps us adapt to and contribute to a world that is constantly changing. 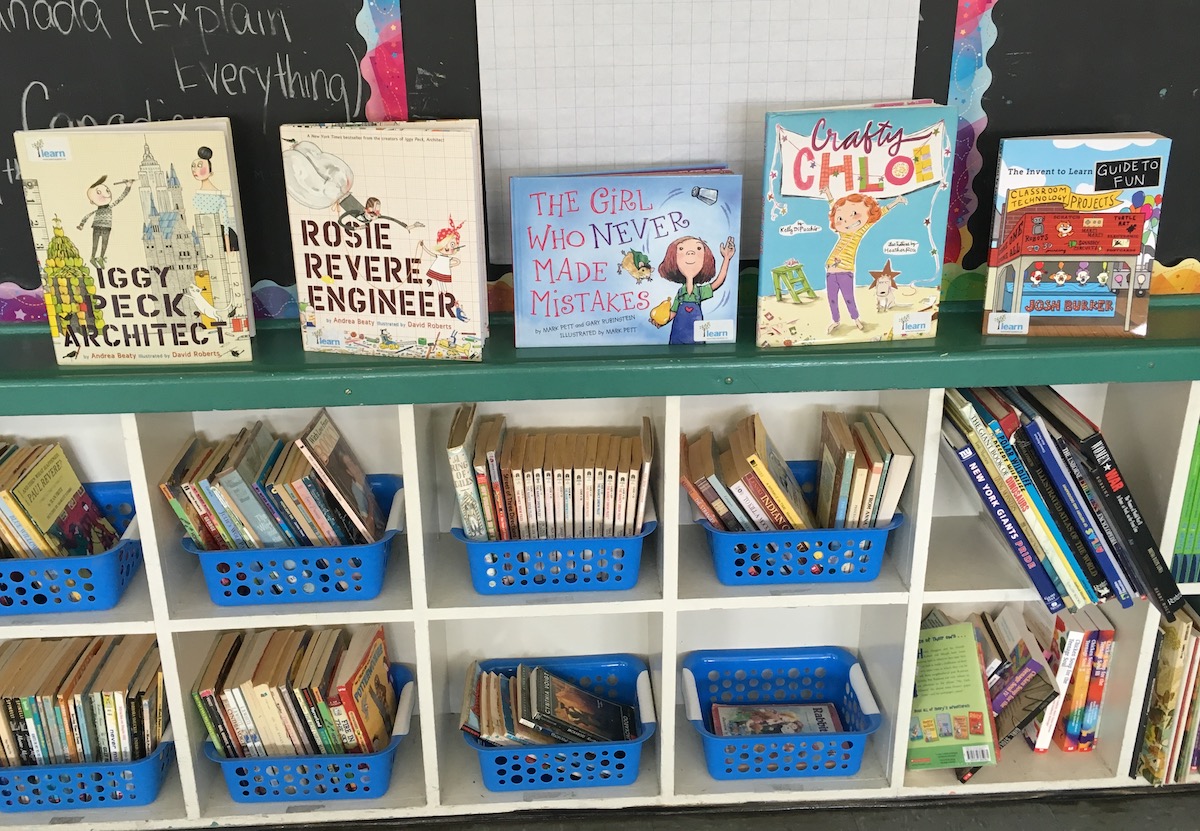
One of the most important roles for teachers in a creative space is to plan learning activities, projects or challenges that allow students room to explore, engage, and evaluate their own learning process through the act of making. Since there is an emphasis on process, there must be time to work on and store projects, a wide choice of materials, and lots of room for mistakes and Ah-Ha! moments.
Developing Cross-Curricular Competencies/21st C. skills
Creative spaces provide a context for lifelong learning, interdisciplinarity, the development of essential skills, and real-world problem-solving. These include the Cross-Curricular Competencies from the Quebec Education Program: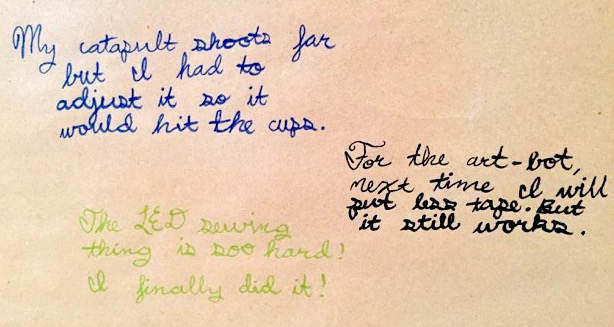
- Uses information
- Solves problems
- Exercises critical judgment
- Uses creativity
- Adopts effective work methods
- Uses ICT
- Achieves his/her potential
- Cooperates with others
- Communicates appropriately
The STEAM approach
STEAM is an integrated, interdisciplinary approach to learning that uses Science, Technology, Engineering, Arts, and Math processes and concepts as anchors to guide student-centred inquiry and experiential learning. It helps to foster critical thinking, creativity, collaboration, and communication while developing competencies and knowledge across subjects by focusing on how they are connected and work together. Creative spaces are great settings for this kind of learning to take place, so they are a great fit.
Different ways to get started
- Using open-ended interdisciplinary challenges as a starting point to learn about a concept, tool, or technology and then taking it further;
- Trying out or remixing existing project examples in order to learn about a concept and to later build on it;
- Exploring different materials and techniques to become familiar with how they work and be inspired to invent and create something new;
- Starting with a specific idea and prototyping with a variety of materials to see what works best for your creation;
- Repurposing and creative reuse – taking objects apart or using recycled materials to make something new;
- Using the opportunity to meet a need at the school by building benches, gardening bins, bat and bird houses, or meet a need in your community;
- Trying to fix something that is broken or mending something that is worn out.
Using Design Thinking to solve real-world problems
The design thinking process can be used in a creative space to address issues in your classroom, school, local community or around the globe (such as UN’s Sustainable Development Goals). This allows students to become involved in making with a purpose for a specific audience.
For more information on the design process, see our blog post: The Design Process - The Backbone of School Makerspaces
What Does a Creative Space Look Like?
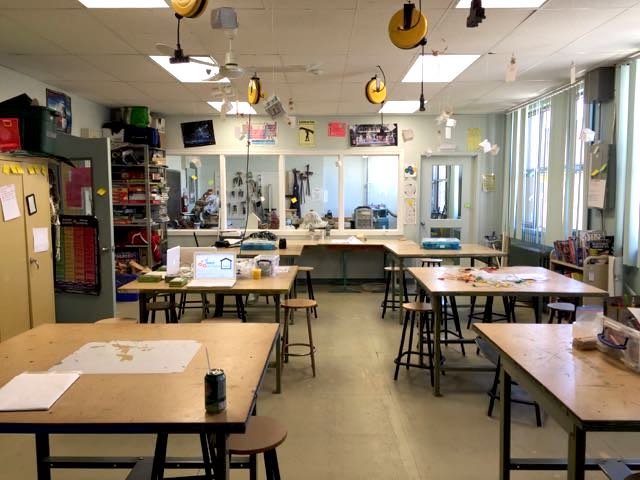 Your space can take many different forms - in fact, no two creative spaces look alike. The physical space can be in a classroom, a library, a designated space in the school, a set of bins in a common area or even a mobile supply cart that you roll into your classroom. It is not just about the physical space, but what will take place in your creative space and the mindset you want to encourage. If many age levels will be sharing the space, you’ll need to consider making a range of work surfaces and tools available.
Materials in creative spaces
The list of available technologies may seem daunting, but your school 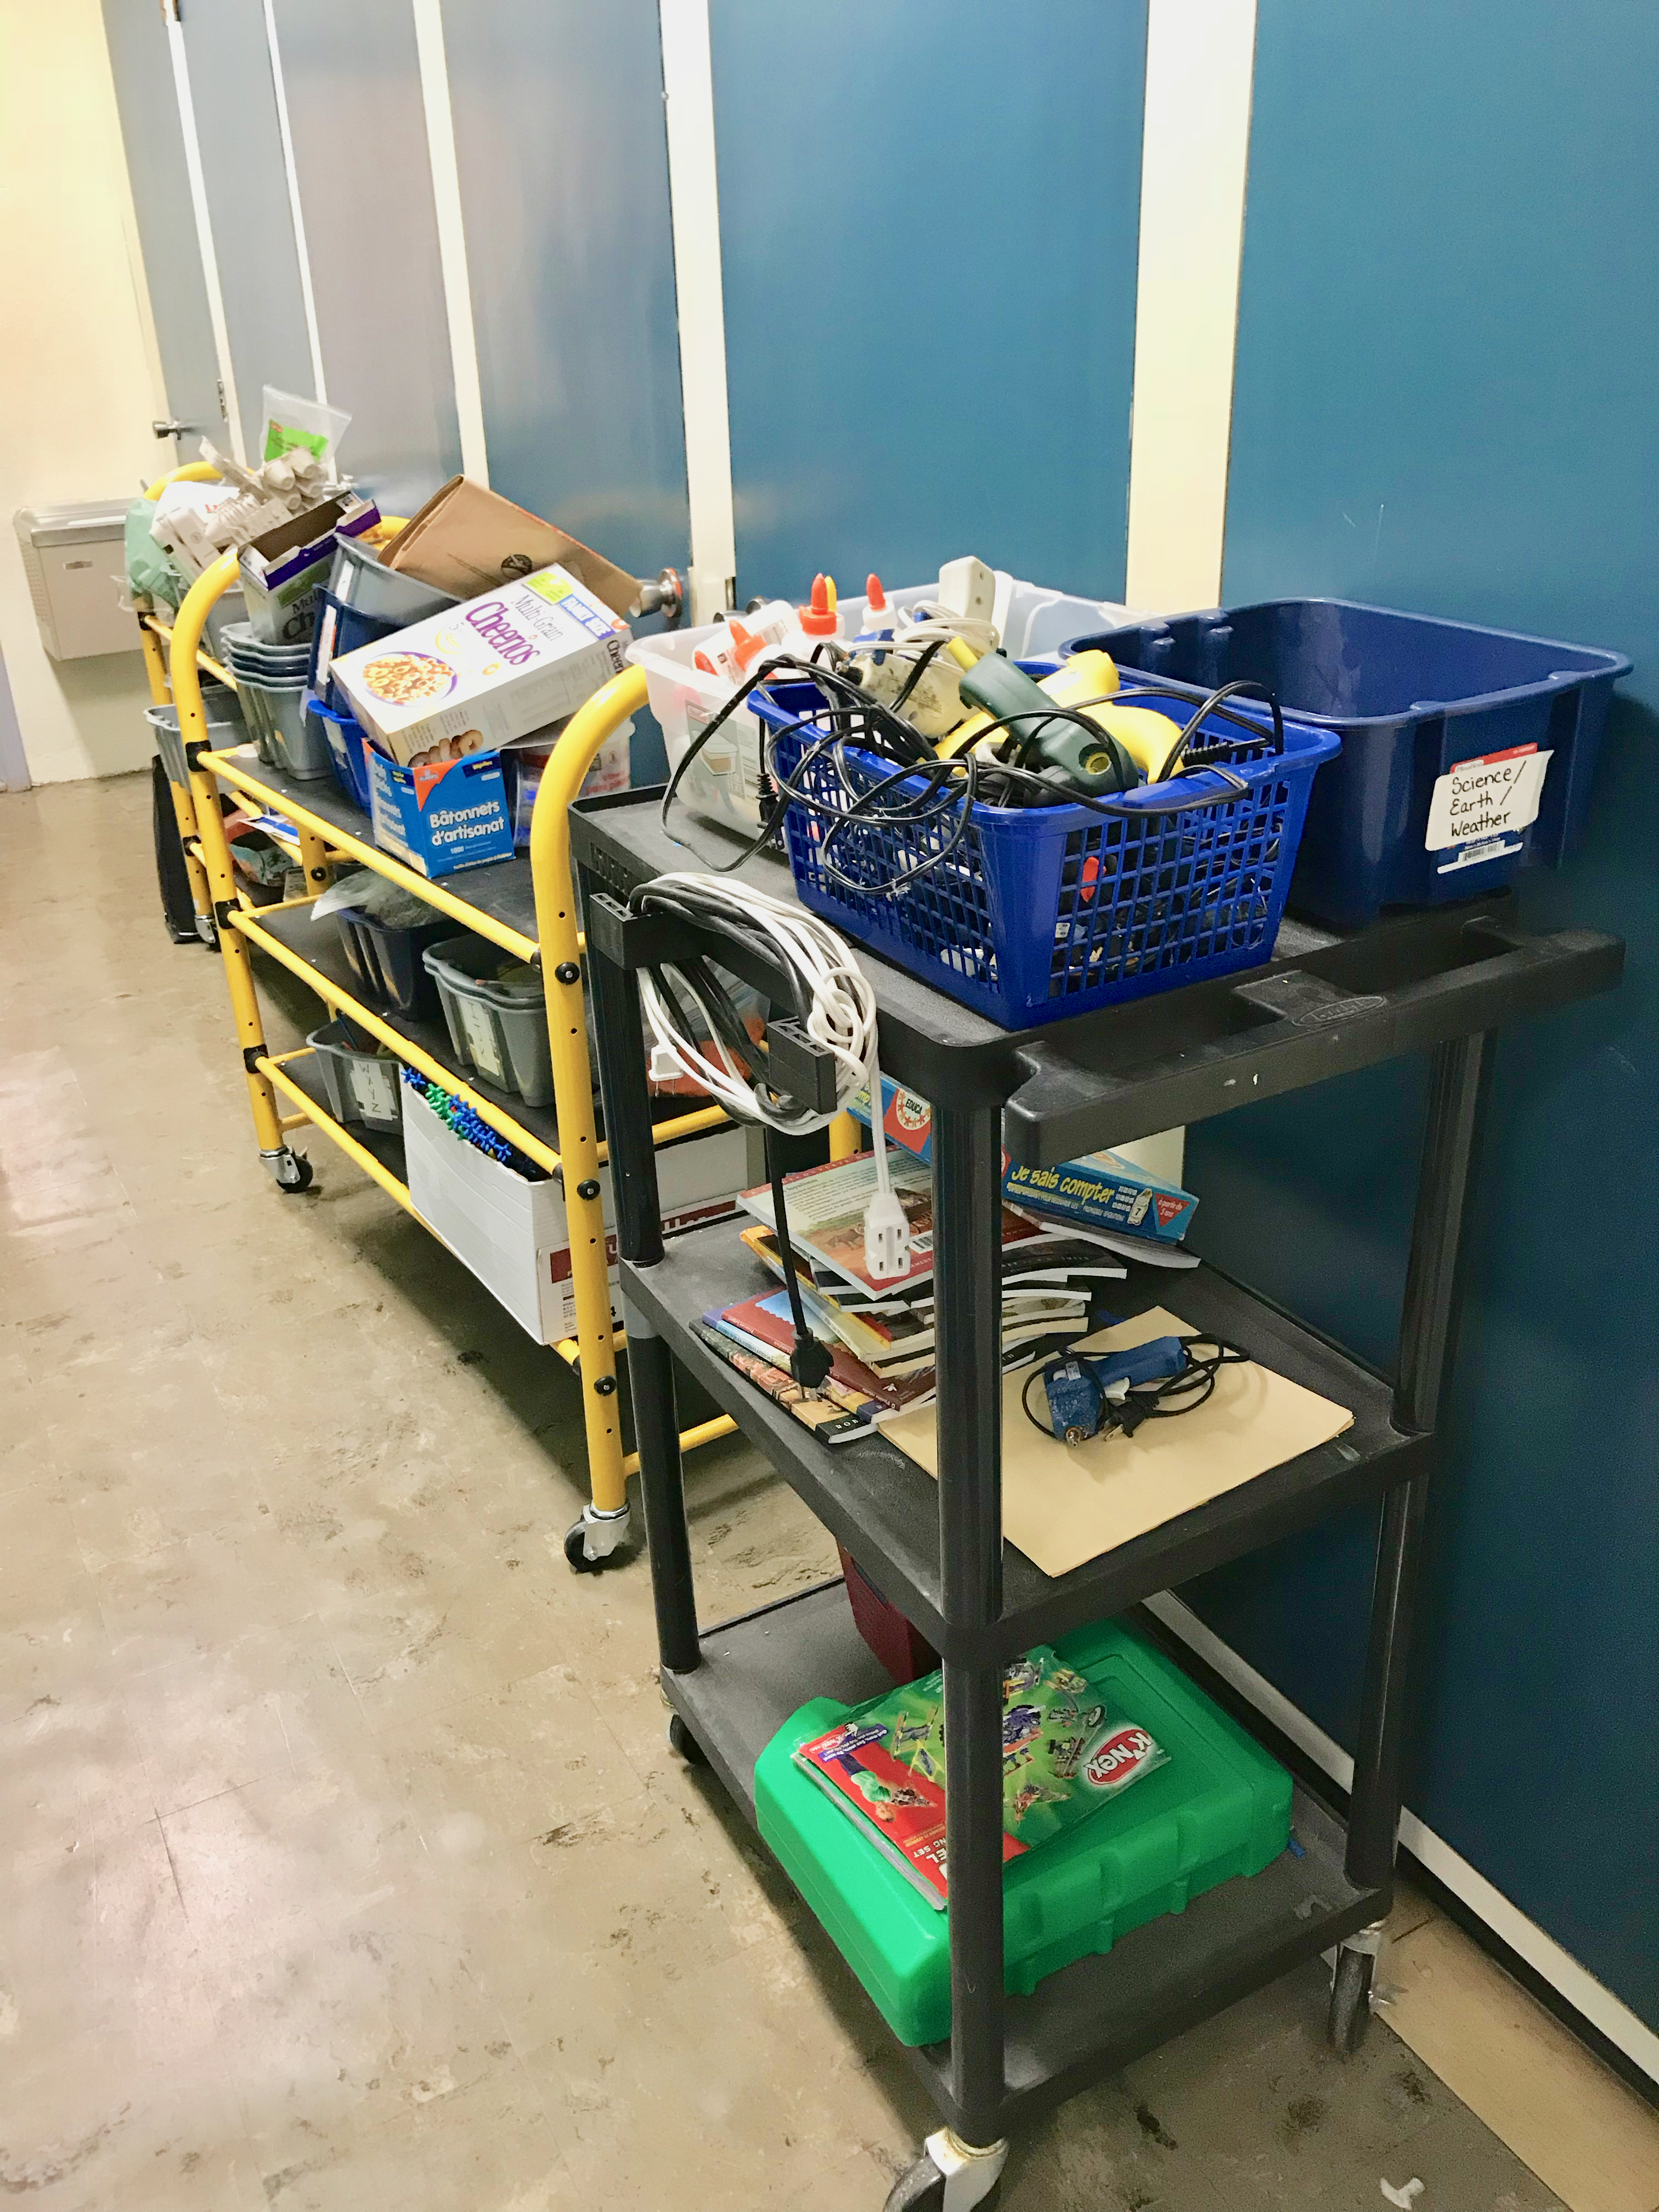 may have already purchased equipment through the funding that was made available for 2018-2019. When looking to invest in a creative space, you can start with what you have and what you know. The materials and tools are simply a means to an end. It is highly recommended that the school community be involved making choices about what to put in the space to meet local needs. Survey fellow teachers, students, and community members about their interests. As a staff, talk about what is happening in the classrooms, and how the creative space might augment the projects, activities, and challenges that are already in the works.
Think about the expression “low floor, high ceiling” - that is, tools that are fairly accessible and easy to start using but which have the potential to expand into larger, more complex projects. You don’t have to know everything to get started. Start small and let it grow. A first step might be to produce a list of consumables for parents to donate to the space. As the space develops, so will the tools. All you really need is cardboard, duct tape and an open mind. Allow for time for students and teachers to begin experimenting with the materials and tools in the space regardless of their familiarity.
What support is available if our school wants to get started with a creative space?
- Consult members of your school community - staff, students, parents, local experts
- Get support from your School Board local RÉCIT and pedagogical consultants ( Go to page![]() )
)
- LEARN’s Open Creative Space website, professional development opportunities, virtual/on-site support ( Go to site![]() )
)
- Community Partners, ie. Kids Code Jeunesse ( Go to site![]() )
)
- Provincial Conferences ie. QPAT, LCEEQ, CCI
- RemixEd Camp
- Training modules on the Campus RÉCIT site (in French) ( Go to site![]() )
)
- Online resources
- Training modules on the CADRE 21 site (in French) ( Go to site![]() )
)
- Online resources for specific tools and technologies (see sections below)
Questions to ask yourself
Pedagogy
What are my pedagogical intentions and goals? What do I want students to learn and be able to do? What subject-specific and cross-curricular competencies do I want students to develop in the creative space? What activities and projects will support their learning?
Learning Environment
What kind of learning environment do we want to create for our students? Are we giving them choice in the type of activities and the materials that they will use? Are we setting up the space to foster collaboration? Are we allowing time for ongoing projects?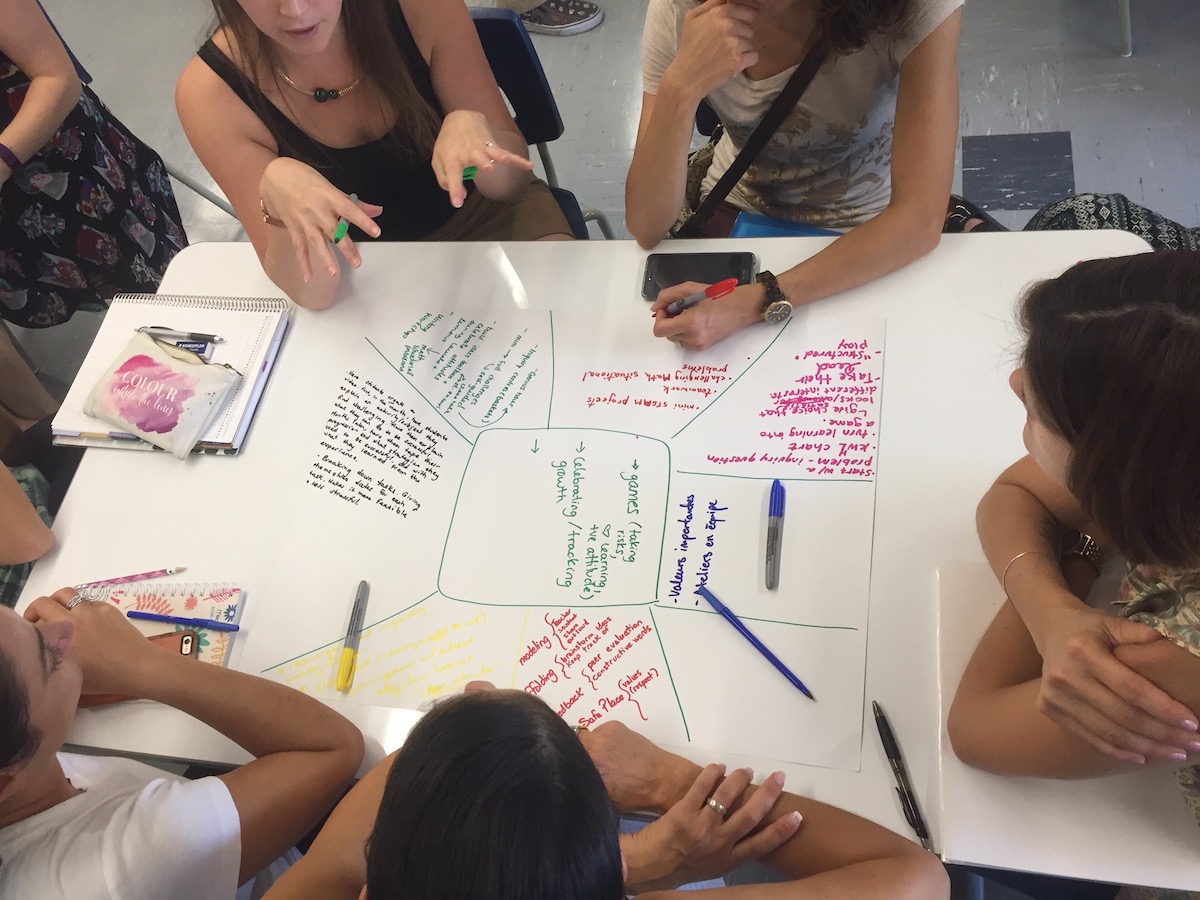
Space and Material Management
Who will have access to the space and/or materials? Who will be responsible for the management of the space and materials? How will we schedule time? Will we embed the creative space into our school timetable? Who will be responsible for the space? How will the community get involved? Who will make community connections? Who will purchase consumables? Who will decide on purchases?
Digital Devices
What digital devices will best support our learning in the creative space? How can different technologies and materials be used to accomplish our goals? How will we make time for teachers and students to experiment with the tools and materials?
Introduction to Educational Robotics
Educational Robotics
Educational Robotics is the use of programming and robotic technologies in the classroom for supporting a student-centered, hands-on learning process. In the digital technology combos, Educational Robotics is a separate category from Creative Spaces, but can be used as part of a STEAM approach. Educational Robotics can be integrated into your current practice where you can focus on creative coding as a way to support students' learning.
What is a robot? What is coding?
There are many definitions for robots. In general, a robot is a physical machine or object that is capable of carrying out actions. Robots can be programmable and have built-in or attached sensors (e.g. distance, temperature, light, inclination). With the use of coding, a robot can change its behaviour or execute a series of actions.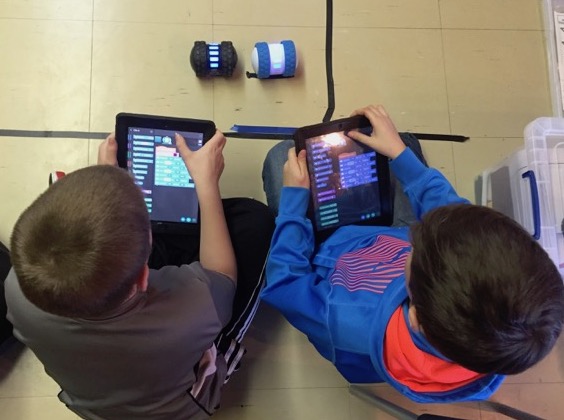
Coding refers to computer programming. It is the primary language between humans and robots and consists of a set of instructions that will tell a computer or robot what to do. There are several different programming languages (e.g. HTML, C++, Java, Python) and the choice of a language depends on your intention. Also, a new, user-friendly form of visual/block programming (e.g. Scratch Junior, Scratch, Blockly) allows students to assemble ready-made blocks of code using the drag-and-drop method. This type of coding is great for younger students or as an initiation to coding.
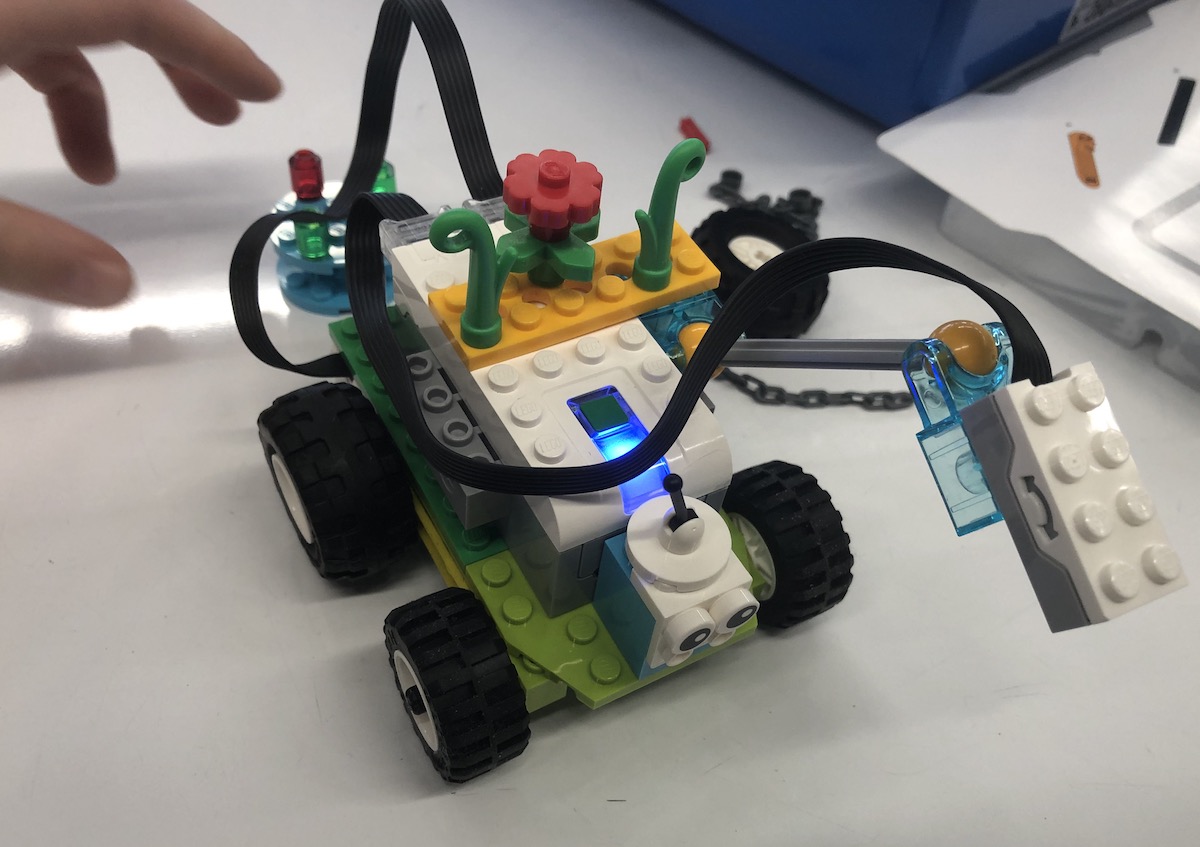 Some examples of robots or programmable hardware that you may hear about or wish to work with are:
- Robots: BeeBot, Dash and Dot, Ozobot, Cubelets, LEGO WeDo, mBot, LEGO NXT/EV3
- Microcontrollers: Micro:bit, MakeyMakey, Arduino,
- Raspberry Pi
The Benefits of Educational Robotics
Educational Robotics is process-oriented and makes learning and thinking visible.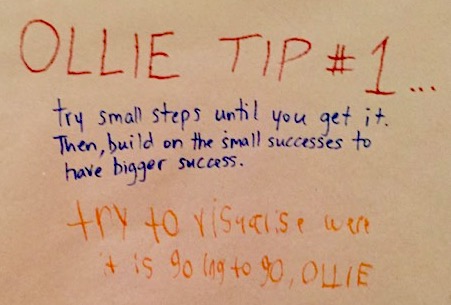
Students make mistakes without judgment. What is needed is simply a “how can I fix it?” attitude. Students then identify the mistakes, stop, question, and problem-solve (or debug). This process encourages critical thinking about how to reach a working robot or program. Students are not only learning the basics of programming and technology, they are designing, constructing, programming, and documenting their learning through journals, portfolios, or blogs.
Educational Robotics is a powerful learning tool to illustrate concepts and apply skills and knowledge in a meaningful and exciting way. Coding and robotics are a great means for integrating STEAM (Science, Technology, Engineering, Arts & Mathematics) activities in the classroom, but also many other subjects such as literacy, history, music and dance. Students are given the opportunity to work together to develop skills such as communication, collaboration, problem-solving, and critical-thinking.
Educational Robotics can contribute to the development of these five crucial 21st Century Skills (Romero & Dupont, 2016):
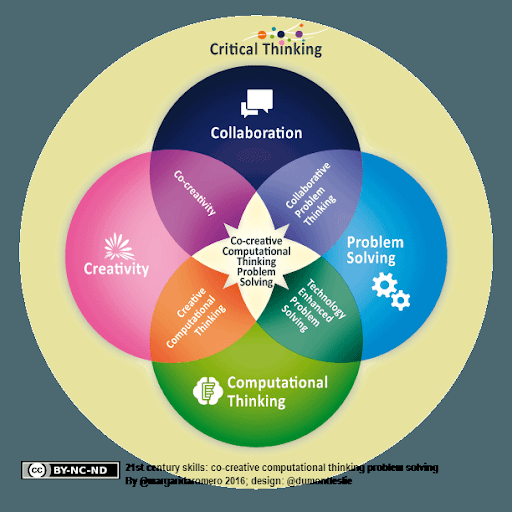 - Critical Thinking
- Collaboration
- Creativity
- Problem Solving
- Computational Thinking
Educational robotics activities are also easily tied to the cross-curricular competencies in the Québec Educational Program (QEP). Students can develop their creativity and problem-solving abilties throughout the process. By working together, students have the opportunity to improve their social and personal skills.
What support is available if I want to get started with educational robotics?
You do not have to be an expert in robotics in order to integrate them in your classroom. You can model problem-solving strategies by working along with your students.
- Consult members of your school community - staff, students, parents, local experts
- Get support from your School Board local RÉCIT and pedagogical consultants ( Go to page![]() )
)
- LEARN’s Open Creative Space website, professional development opportunities, virtual/on-site support ( Go to site![]() )
)
- Community Partners, ie. Kids Code Jeunesse ( Go to site![]() )
)
- Provincial Conferences ie. QPAT, LCEEQ, CCI
- RemixEd Camp
- Training modules on the Campus RÉCIT site (in French) ( Go to site![]() )
)
- Online resources for specific tools and technologies (see sections below)
Questions to ask yourself
Pedagogy
What are my pedagogical intentions and goals?
What do I want students to learn and be able to do?
What subject-specific and cross-curricular competencies do I want students to develop through educational robotics?
What activities and projects will support their learning?
What do my students know about robotics and how do I want to introduce the subject?
Management of Space and Material
How should I organize my classroom to facilitate robotics activities and learning? How should I organize the different materials? Do I want students working in teams or individually for a certain activity?
Digital Devices
What robots and microcontrollers will best support my pedagogical intention and goal? How can different robots and microcontrollers be used to accomplish my goals? How will we make time for teachers and students to experiment with the tools and materials?
Resources
Margarida Romero's Online Book - Go to site![]()
Introduction à la robotique pédagogique - Go to site![]()
La robotique pédagogique pour mieux comprendre - Go to site![]()
Educational Robotics: from procedural learning to co-creative project oriented challenges with LEGO WeDo - Go to site![]()
Educational Robotics Poster - Go to site![]()
Learning to Code: from procedural puzzle-based games to creative programming by Romero et al. - Go to site![]()
Introduction to Digital Devices
What Are Digital Devices?
Digital devices - like chromebooks, laptops, iPads, and other tablets - are tools that can make learning more interactive. Teachers and students use them as tools to record their learning processes, to create unique artifacts like videos or other student productions, as well as to easily access information as it is needed.
Digital devices are also essential for any experimentation with robotics and many of the activities that take place in an open creative space.
For instance, devices such as computers and tablets, along with other materials, can be used for creating, researching and documenting a student's process in a creative space or classroom. For example: 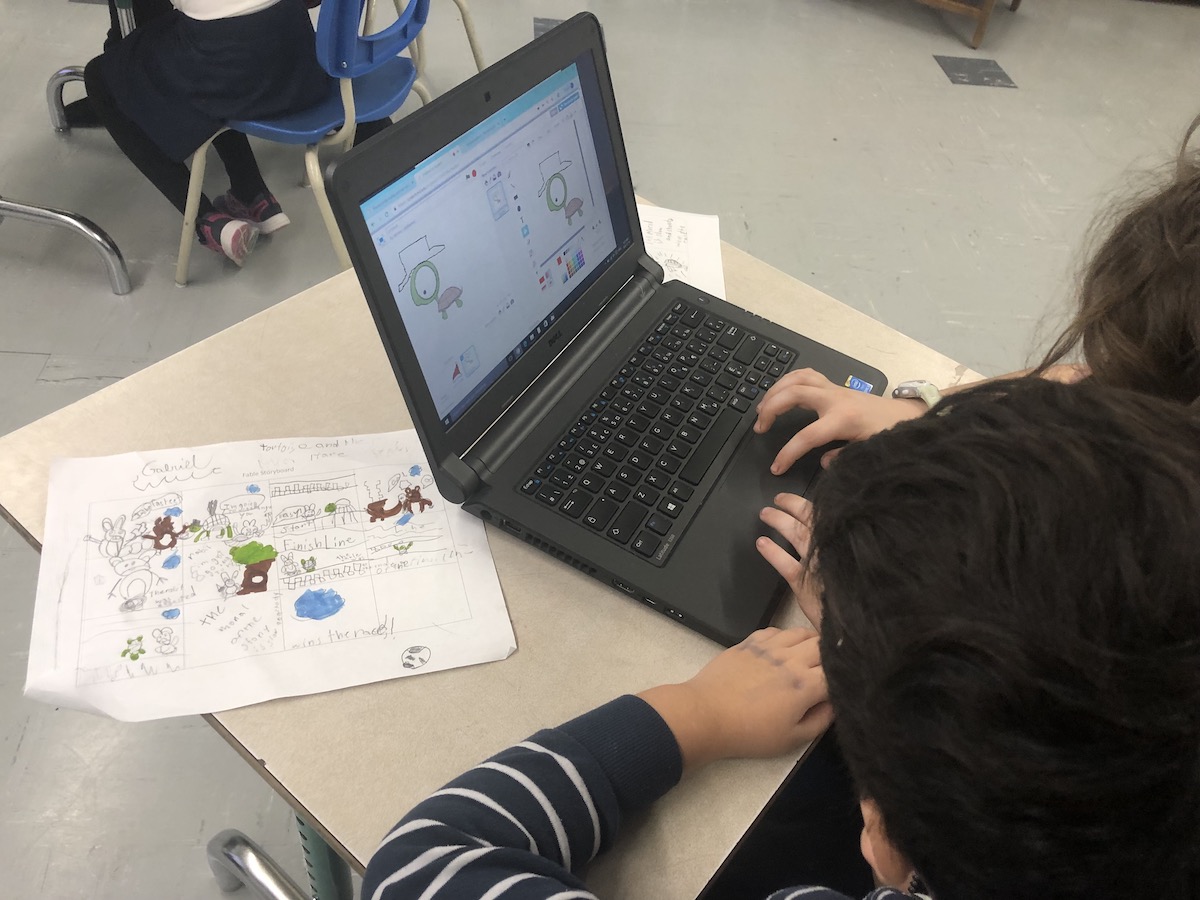
- creating animation (claymation, Lego, green screen)
- digital storytelling
- creating games with programming tools such as Scratch 3.0
- finding information, examples and projects that others have posted online
- documenting work in process through photos and videos and written notes in a reflective journal or portfolio
- creating and publishing how-to videos or web pages that can be useful to others
- connecting computers and the physical world using microcontrollers such as the Makey Makey and Micro:Bit
- sharing process and creations with others through blogs and social media
- networking with others who are working on similar projects
Tools for Creating and Sharing our Stories around Learning
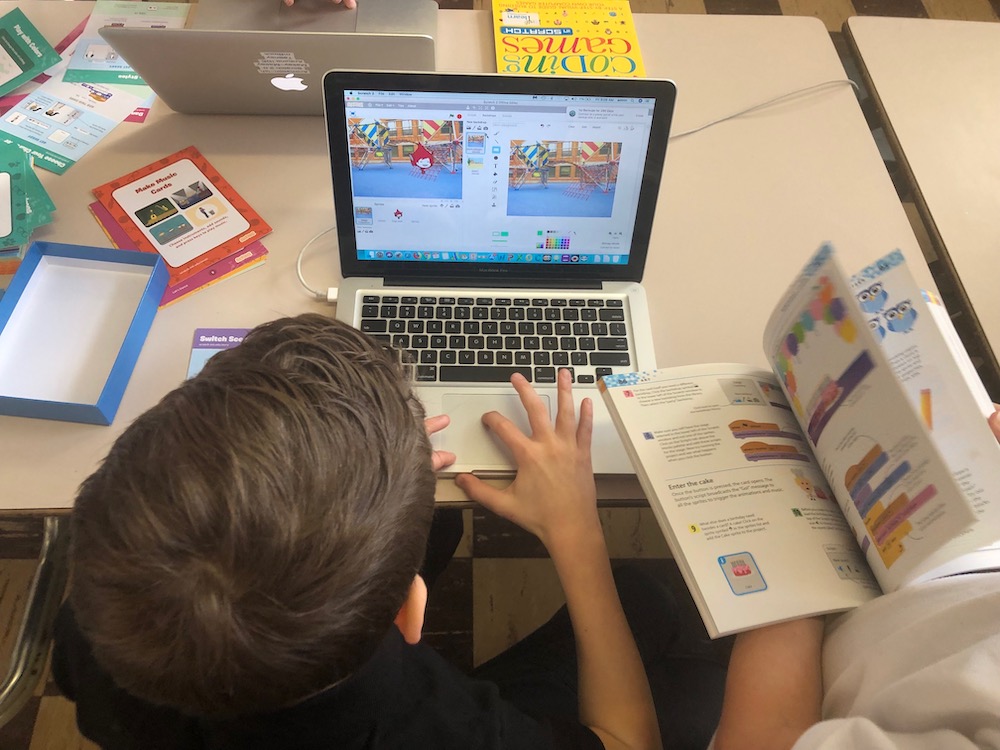 Perhaps most importantly, they are also tools with which teachers, students, parents, caregivers, and community partners can communicate with each other about learning. Having a diverse selection of devices available in a school or centre is ideal so that students and teachers can choose the device they need based on the learning goals and tasks at any given time.
Pedagogical Models and Digital Devices in the Classroom
Stations-based teaching and blended learning
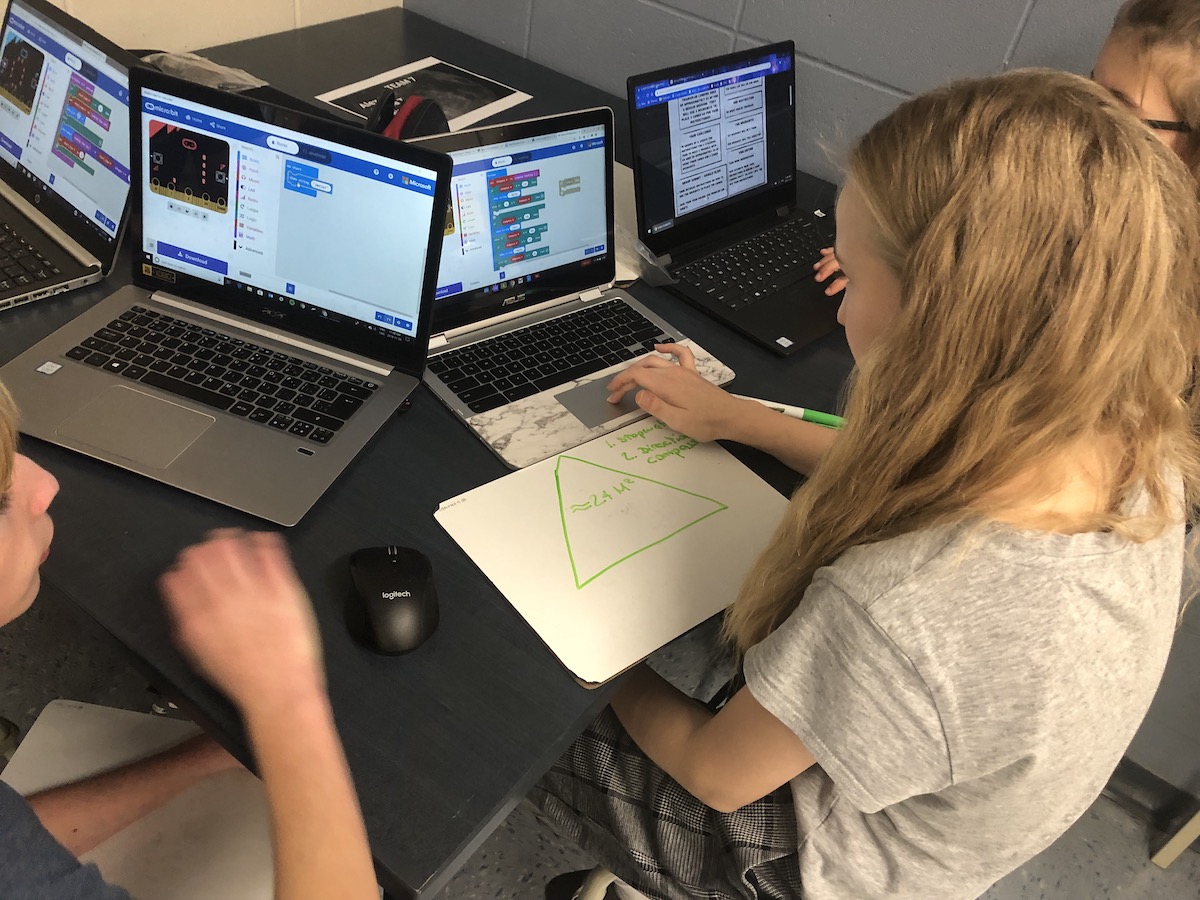 Teaching in stations allows learning to happen in small groups. When using a station-rotation model, where learners rotate through different stations including a teacher-station, teachers can touch base with small groups of students at a time while the rest of the class is busy actively engaged with other activities - and each other. This is an excellent way to structure the use of digital devices in a classroom so that small groups of students are using them at any given time.
This video describes how Lindsay Harrar, a second language teacher at ACCESS Adult Centre of the Riverside School Board, uses stations. She talks about the role of digital devices in the learning process during one of her lessons.
Tracy Rosen, the Education Consultant for Quebec's English Adult Education RECIT, has made a video exploring how students feel about the station-rotation model and in the interests of including the student's voice, their perspective helps guide our own practices.
Flexible Classrooms
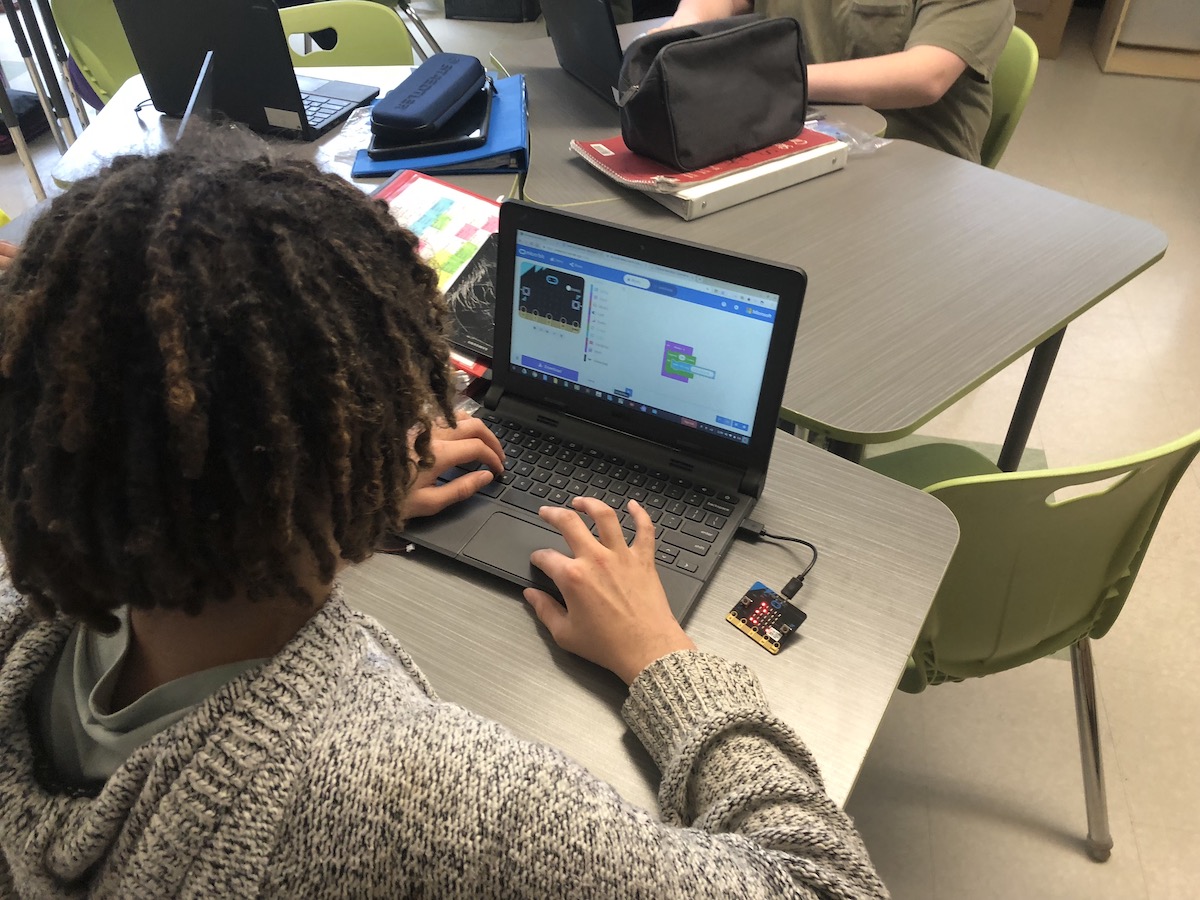 Digital devices are essential elements of a flexible classroom space. Many teachers have begun to design their classrooms to offer more choices to students regarding where and how they learn. In some flexible classroom spaces, devices are spread out in different areas of the room, and in other rooms, there are specific zones for using digital devices. It all depends on what works best for you and your students in relation to the learning intentions.
For more on Flexible Classrooms,
Questions to Ask Yourself
What are my learning intentions and which devices will help my students or adult learners within this context?
What kinds of devices will best support the activities within my discipline? (for example, writing may be done better on a chromebook or laptop while creating video may be done better with a tablet.)
How are the devices facilitating conversation between students?
Am I allowing for student choice in regards to which devices they use?
How will I design my classroom environment to support the use of different digital devices?
Coding and Software
Scratch Junior
 With ScratchJr, young children can program their own interactive stories and games. In the process, they learn to solve problems, design projects, and express themselves creatively on the computer. This program works with tablets and chromebooks.
- App - Go to site![]()
- First Steps - Go to site![]()
- Tutorial - Go to site![]()
- Going Further - Go to site![]()
Scratch 2.0
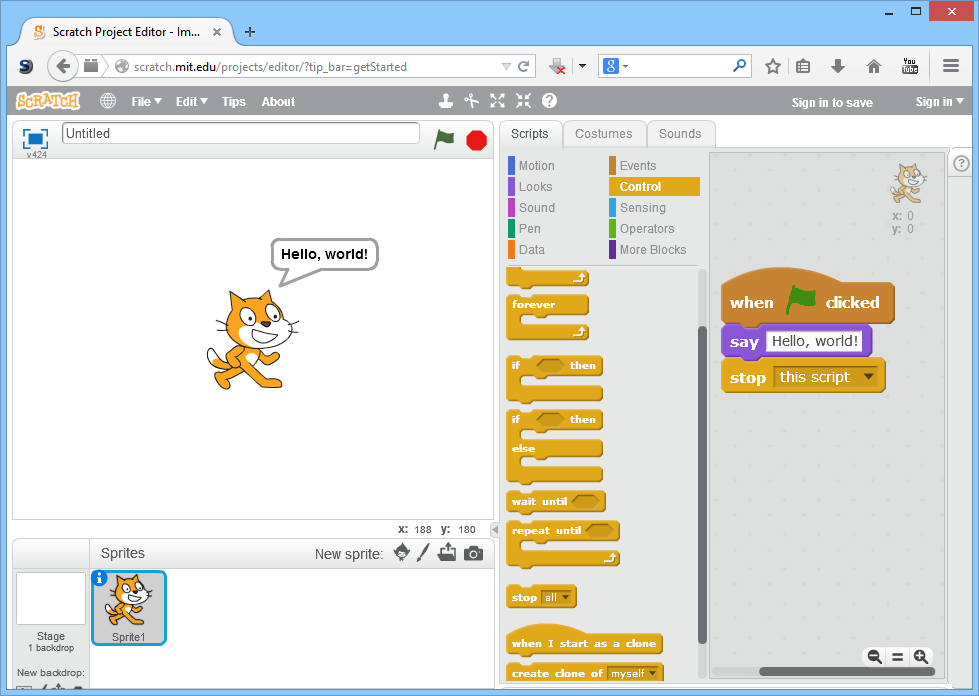 Scratch was developed by the Lifelong Kindergarten group at MIT. It is a popular program that you can install on your computer or use online and it has a robust community of "Scratchers" who share their projects and ideas.
- Offline Software - Go to site![]()
- First Steps - Go to site![]()
- Tutorial - Go to site![]()
- Going Further - Go to site![]()
Scratch 3.0
This is the latest version of Scratch and it has been improved substantially. Now, you can play with Scratch on a tablet or Chromebook! What we are most excited by is all the different technologies you can connect Scratch to - like Micro:Bits, EV3, WeDo 2.0, Google Translate, Makey Makey, and more!
- First Steps - Go to site![]()
- Explore - Go to site![]()
- Join for free - Go to site![]()
- Info for Educators - Go to site![]()
- Info for Parents - Go to site![]()
Scratch Resources
- ScratchEd: Creative Computing Curriculum Guide Sneak Peek of v.3 - Download resource![]()
- Harvard Strategies for Getting Unstuck - Go to site![]()
MakeCode
Makecode is a block programming website designed to work with the Micro:bit. This platform makes it easy to connect your device, to write interesting code using the Micro:bit's sensors, and to share your work with your colleagues. It features a visualizer that shows you what your code will do after it has been uploaded to your Micro:Bit and it has tutorials to help you get started.
- Micro:bit Online Software - Go to site![]()
- First Steps - Go to site![]()
- Going Further - Go to site![]()
Snap
Snap! is a free, blocks- and browser-based educational graphical programming language that allows students to create interactive animations, games, stories, and more, while learning about mathematical and computational ideas.
- Online Software - Go to site![]()
- Tutorial - Go to site![]()
- Going Further - Go to site![]()
TurtleArt
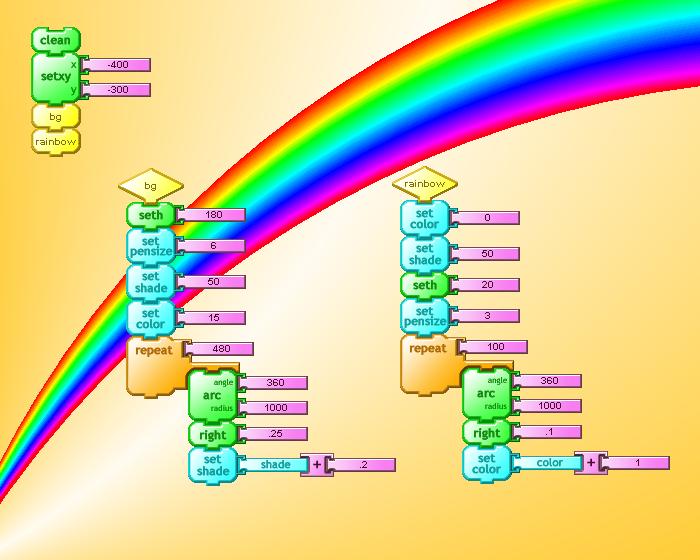 TurtleArt is an innovative program designed to facilitate artistic expression and design through code! It works on tablets and computers and is a great starting point for students who want to make art by programming.
- Request to download offline editor from creators for educational/personal purposes - Go to site![]()
- TurtleArt iPad App - Go to site![]()
- First Steps - Go to site![]()
- Tutorial - Go to site![]()
- Going Further - Go to site![]()
Blockly
Blockly was built by Google for developers and is a block programming language that is compatible with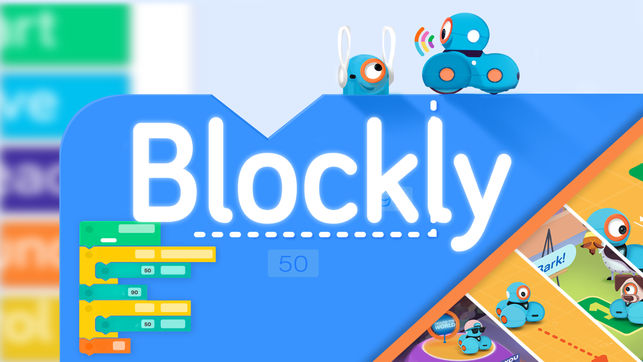 a variety of devices such as Ozobots, Micro:bits, Dash & Dot, MBot, and many others. It is versatile, open source, and is great for translating block code into real programming languages like Python and JavaScript!
- Blockly Developer's Website - Go to site![]()
- Overview and First Steps - Go to site![]()
- Explore Demos - Go to site![]()
Educational Robotics Materials
Dash & Dot (Tablet)
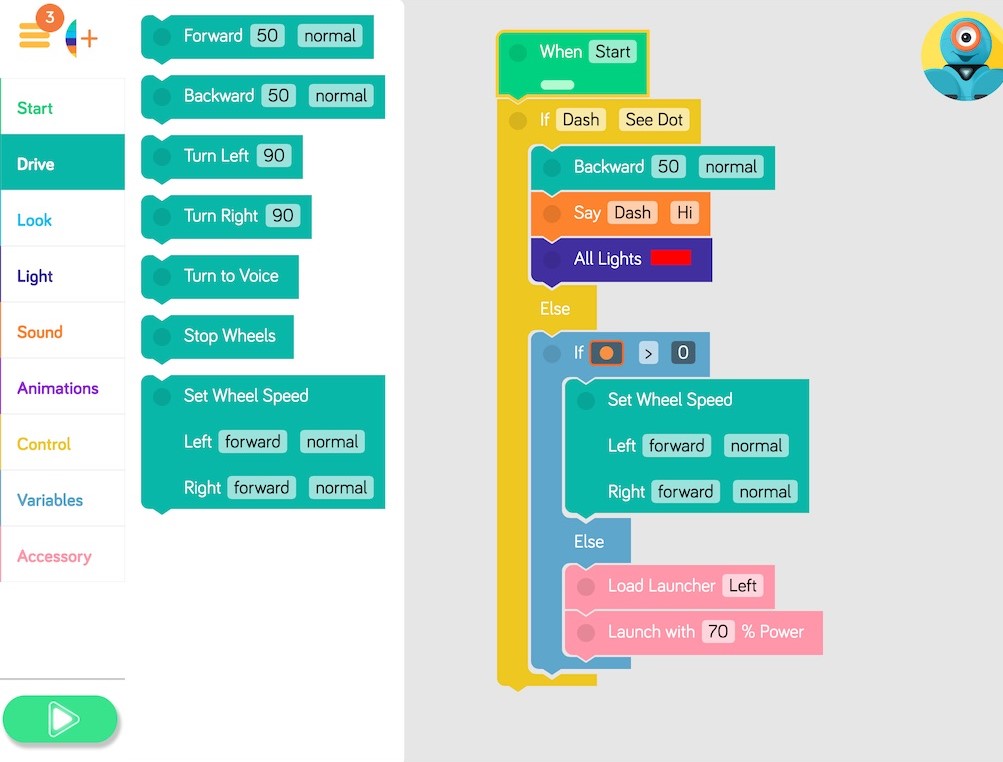 Dash & Dot are a pair of programmable robots designed to help kids turn their code into a tangible learning experience. Watch as Dash & Dot navigate the world based on the instructions you have given it!
- Master Link of all Wonder Apps (scroll down to "Apps") - Go to site![]()
- Tickle (iPad only) - Go to site![]()
- First Steps - Go to site![]()
- Tutorial - Go to site![]()
- Going Further - Go to site![]()
Ozobot (Tablet)
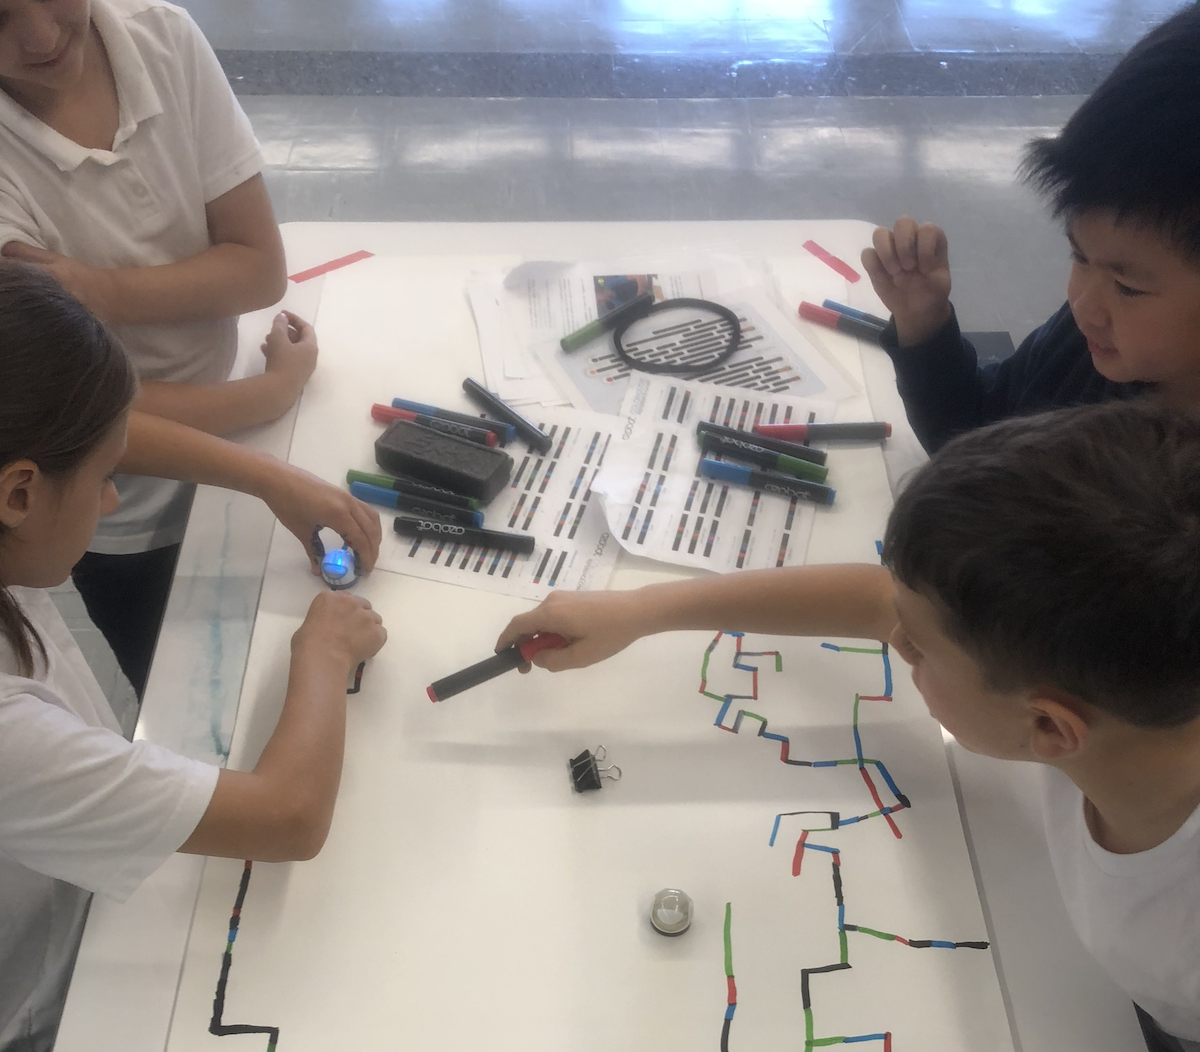
Ozobots are small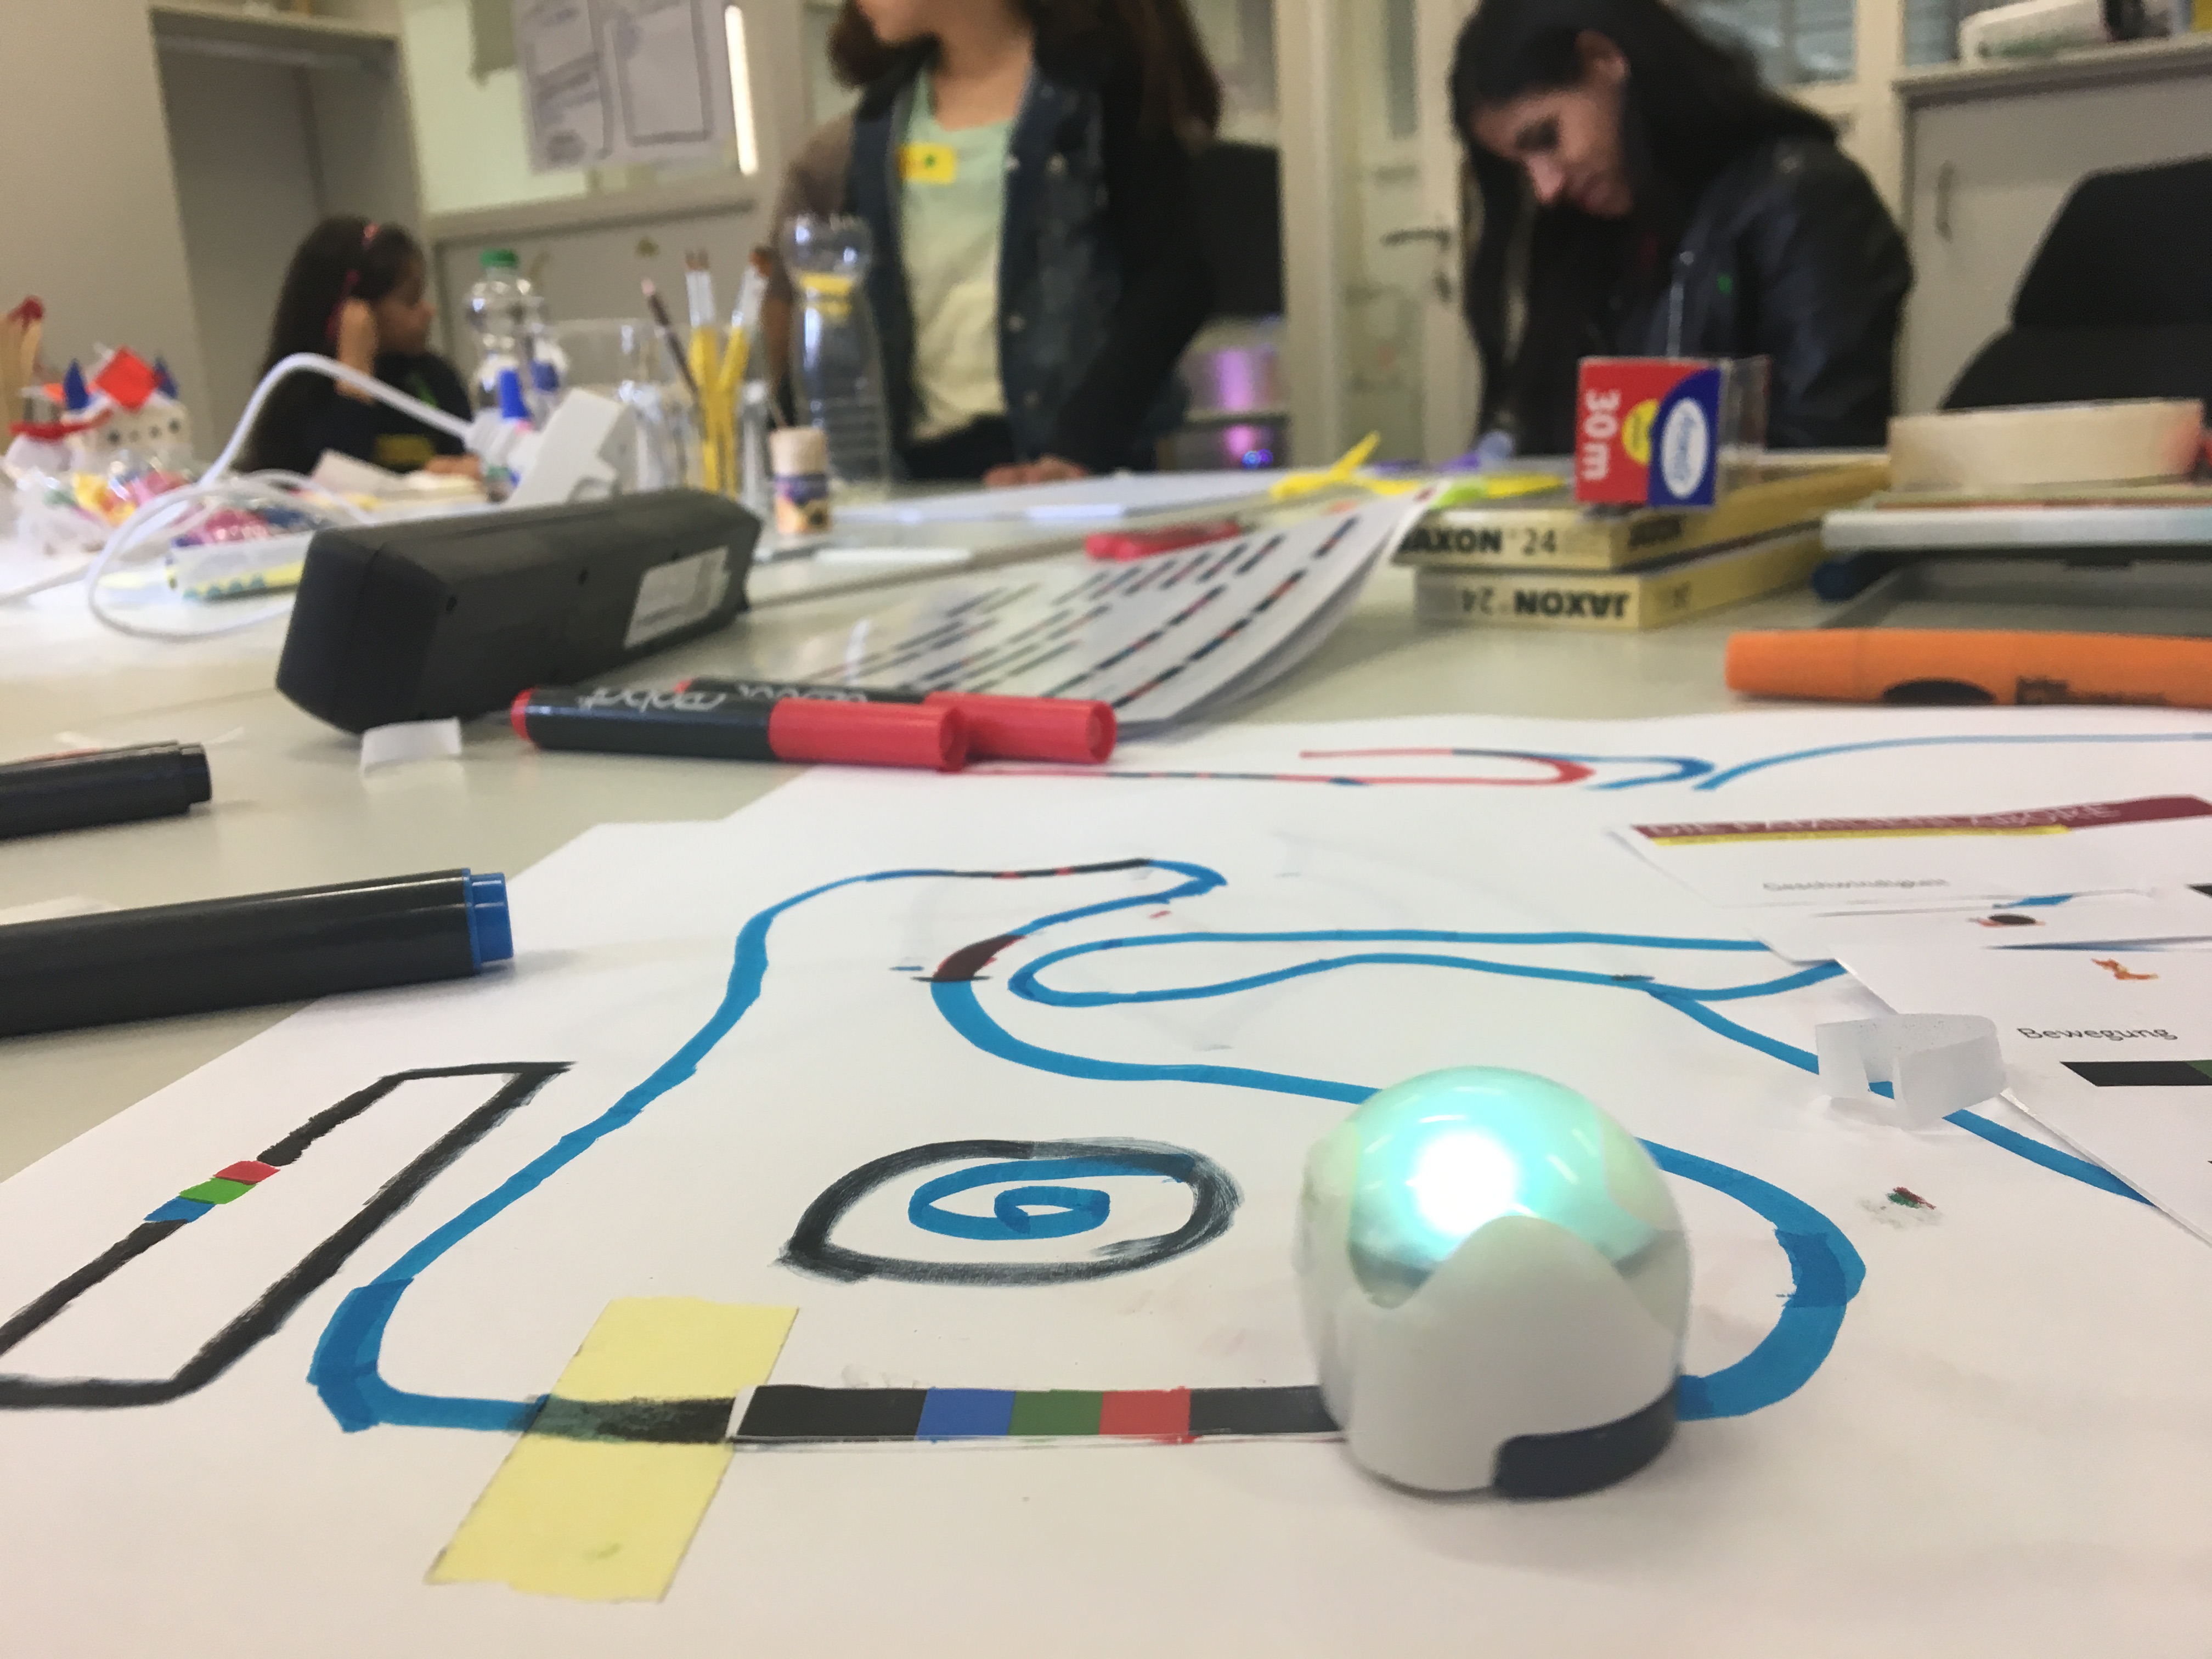 robots that are able to interpret colour sequences as commands. Instead of using text to tell the robot to turn left or spin or accelerate, you use a pattern of colours that the Ozobot can read. This leads to lots of exploration, drawing, and design as students draw maps filled in with coloured "blocks" of code.
- Ozobot App - Go to site![]()
- First Steps - Go to site![]()
- Tutorial - Go to site![]()
- Going Further - Go to site![]()
MBot
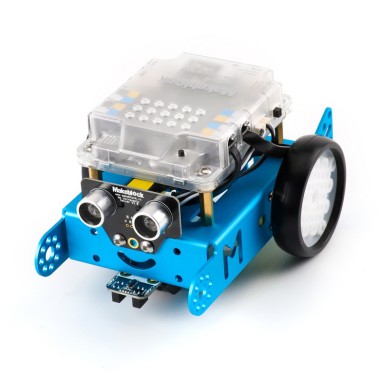 mBots are robots that you get to build and program yourself! Kits include a set of parts, like sensors, cables, wheels, and a body, that you assemble into a vehicle. Then, you can use the MakeBlock programming language to give your vehicle instructions. The latest version of MakeBlock on tablets allows you to control your mBot via bluetooth!
- MBlock (Computers) - Go to site![]()
- MakeBlock (Android) - Go to site![]()
- MakeBlock (iOS) - Go to site![]()
- First Steps - Go to site![]()
- Tutorial - Go to site![]()
- Going Further - Go to site![]()
Sphero, Sphero Mini, and Ollie

- Sphero Edu (Tablets and Google Chrome) - Go to site![]()


![]()
- First Steps - Go to site![]()
- Going Further - Go to site![]()
LEGO MINDSTORMS EV3
LEGO has always been about creative, constructive play so it is no surprise that they are bringing programming into the mix. With many different build options and a unique program to control your robots, LEGO wants you to bring your robot to life. 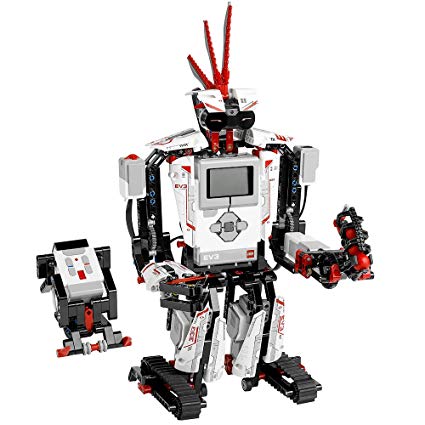 Their program works on PCs and Macs and even tablets!
- Tablets and Computers - Go to site![]()
- First Steps - Go to site![]()
- Tutorial - Go to site![]()
- Going Further - Go to site![]()
LEGO WeDo 2.0
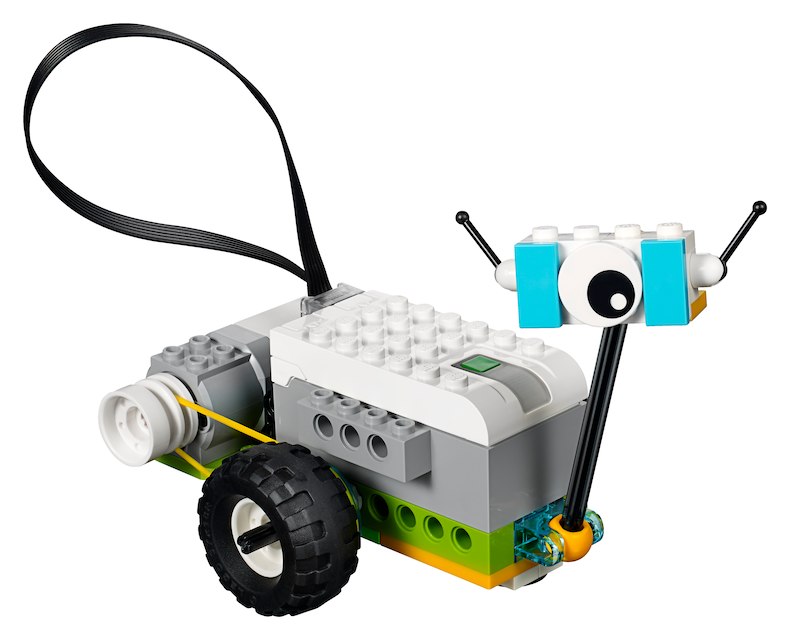 The LEGO WeDo 2.0 is another programmable LEGO kit that distinguishes itself by its accessibility. With just a few motors, pulleys, and LEGO blocks, you can move a car or create a windmill or a catapult. A bluetooth option exists so you can control components directly but this kit is just as fun and educational when used by itself.
- Software for all devices - Go to site![]()
- Quick Start Guide - Go to site![]()
- Building Instructions - Go to site![]()
- Teacher Guides and Preparation Materials - Go to site![]()
- Lesson Plans - Go to site![]()
- LEGO Education Curriculum Pack - Go to site![]()
- LEGO Computing Extension Projects - Go to site![]()
- Purchase a Set - Go to site![]()
Bee-Bot

- A Teacher's Guide - Go to site![]()
- Purchase a Set - Go to site![]()
Microcontrollers
A microcontroller is a programmable circuit board that is ideal for special projects. They are great tools for solving specific problems and for animating or controlling toys and tools that you have made. Some microcontrollers even work with fabric so you can animate your clothes! Others can do advanced tasks like checking the weather, watering a plant, or running a website. They are like swiss army knives and are surprisingly common - many can be found in everyday household devices.
Micro:bit
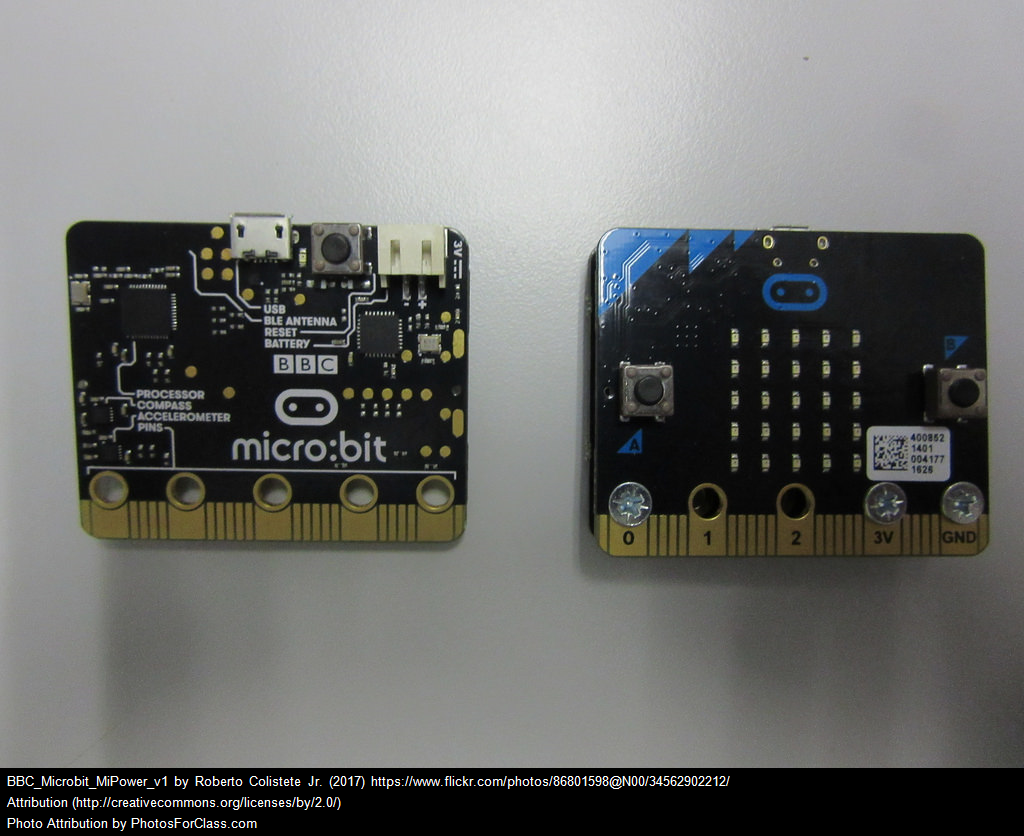 The micro:bit was designed by the BBC for use in the UK education system. It is very affordable, small, and versatile. To use it, the MakeCode website provides a block programming interface that is easy to use. It features interesting sensors like accelerometers, photosensitive LEDs, and even a radio emitter.
- MakeCode (Online only) - Go to site![]()
- Micro:bit App (Tablets) - Go to site![]()
- Tickle (iPad only) - Go to site![]()
- First Steps - Go to site![]()
- Tutorial (scroll down) - Go to site![]()
- Going Further - Go to site![]()
Raspberry Pi
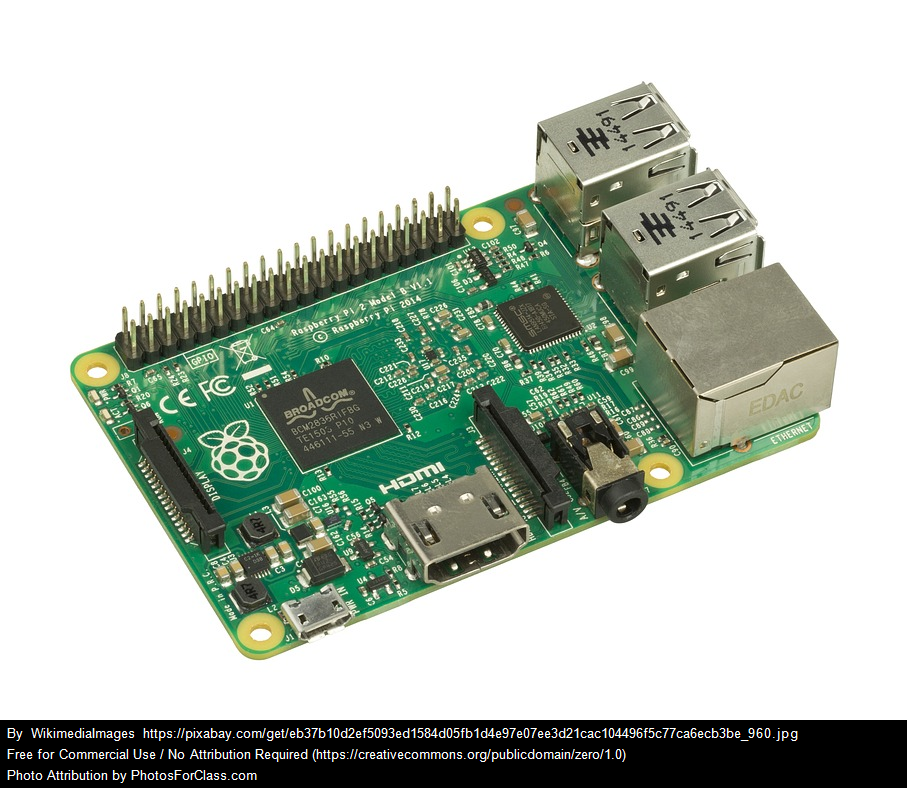 The Raspberry Pi is known as the world's cheapest computer. It doubles as a microcontroller which makes this device useful for a wide variety of projects or personal activities. Its main advantage is that it can process more than one program at a time. It has WiFi and HDMI and is fast enough to surf the web but can also be adapted for highly specific goals like building an arcade cabinet or a magic mirror. It runs on the operating system Linux instead of iOS (Apple) or Windows (PC).
- RPi Setup - Go to site![]()
- Operating System Download - Go to site![]()
- First Steps / Help - Go to site![]()
- Tutorial - Go to site![]()
- Going Further - Go to site![]()
- LEARN Resources - Go to site![]()
Arduino
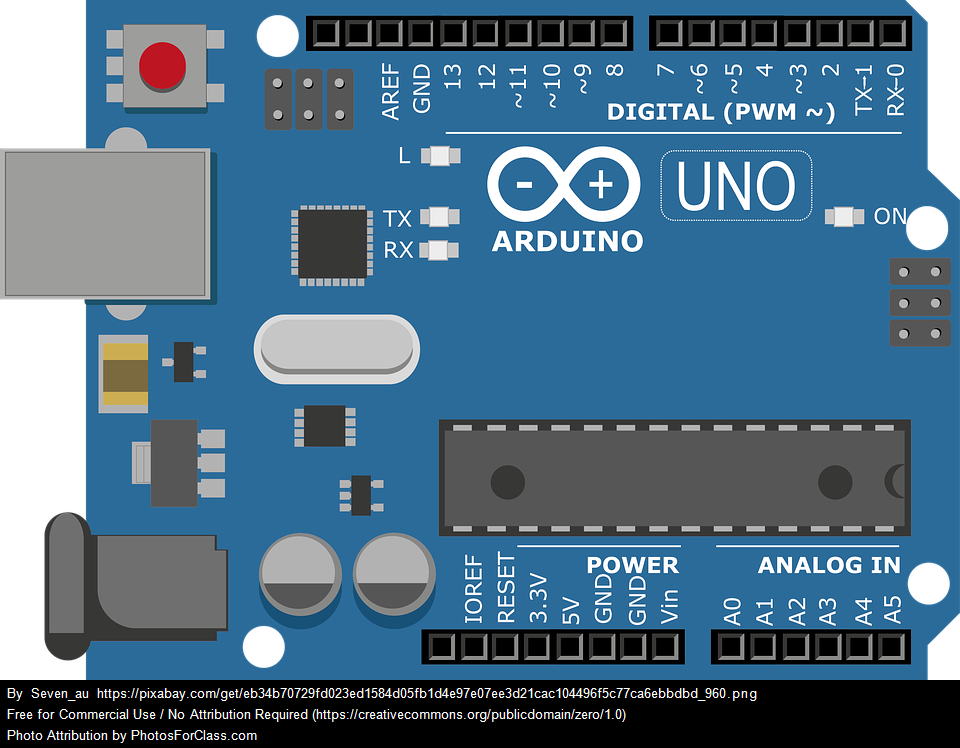 Arduinos are the quintessential microcontroller. They come in many shapes and sizes and are very inexpensive. The main difference between an Arduino and a Raspberry Pi is that the former can only process one program at a time whereas the latter can process many programs at once. While the Arduino may be simpler, it is also less expensive. Programs are written and run using the Arduino software.
- Online Web Editor - Go to site![]()
- Offline Editor (Computers only) - Go to site![]()
- First Steps - Go to site![]()
- Tutorial - Go to site![]()
- Going Further - Go to site![]()
Adafruit Flora
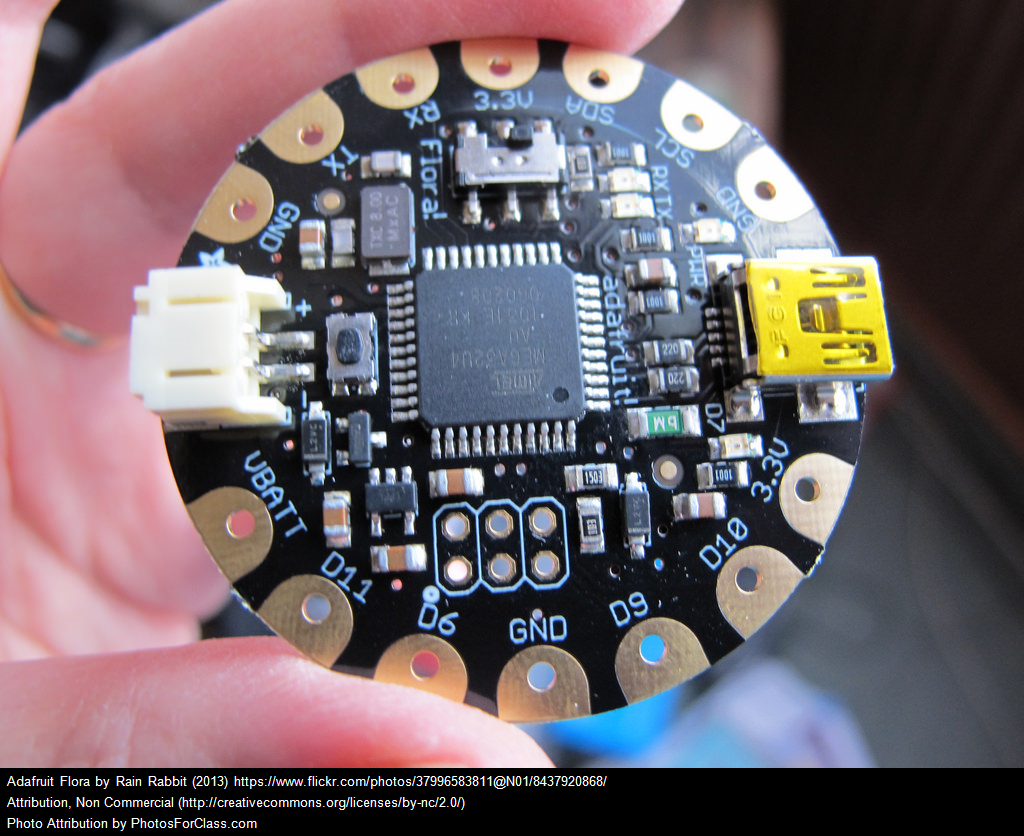 The Adafruit Flora is a sewable microcontroller. It comes with micro-USB support making it easy to program. It is round, light, and robust with a large circuit board to play with. It can be used to animate lights, make sounds, and coordinate patterns. It works best with Arduino IDE software and conductive thread.
- Adafruit Arduino Setup - Go to site![]()
- Intro Video - Go to site![]()
- Getting started with Flora - Download resource![]()
- Projects and Tutorials - Go to site![]()
Adafruit Gemma
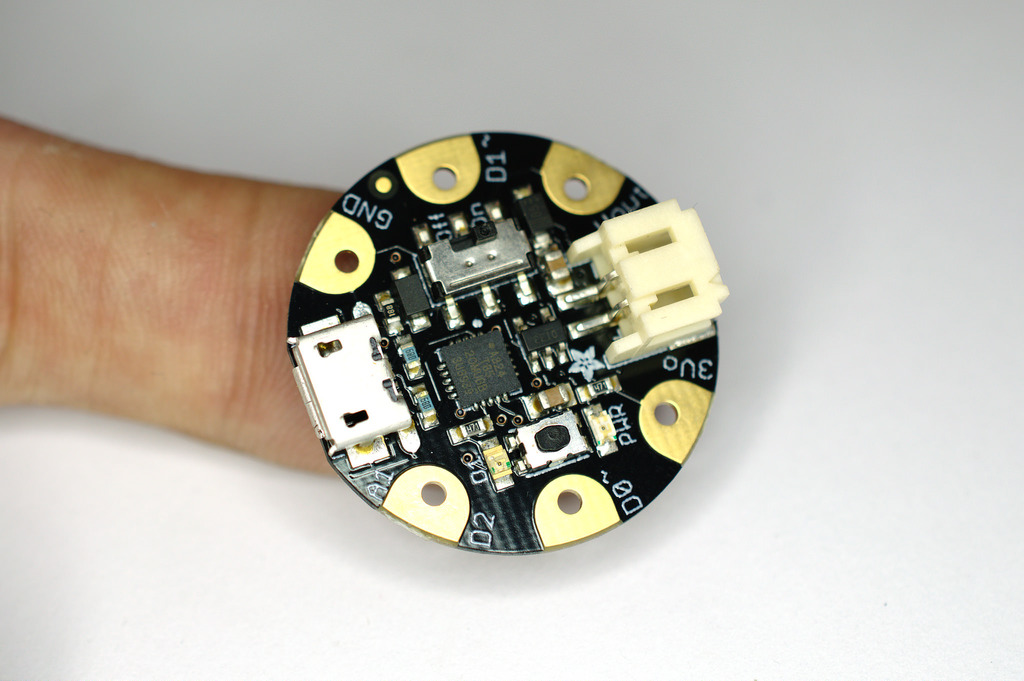 The Adafruit Gemma is a tiny, wearable platform board similar to the Flora. It is a sewable microcontroller that can be programmed over micro-USB using Arduino IDE software. It is smaller than the Flora and has less connections so is better suited to simpler or smaller projects.
- Adafruit Arduino Setup - Go to site![]()
- Intro Video - Go to site![]()
- First Steps - Go to site![]()
- Projects and Tutorials - Go to site![]()
- Chirping Plush Toy Kit - Go to site![]()
Lilypad Arduino Sewable Electronics Kit
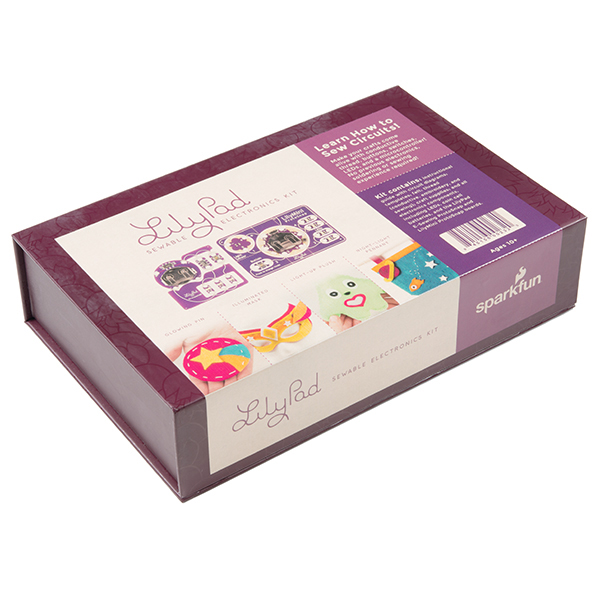 This box set comes with a variety of sewable electronics devices and components. The kit comes with two LilyPad ProtoSnap boards along with buttons, switches, and LEDs. Complete with an instruction manual containing four complete sewable circuit projects, this is the ideal kit for a beginner starting out.
- Intro Video - Go to site![]()
- First Steps - Go to site![]()
- LilyMini Protosnap Hook-Up Guide - Go to site![]()
Makey Makey
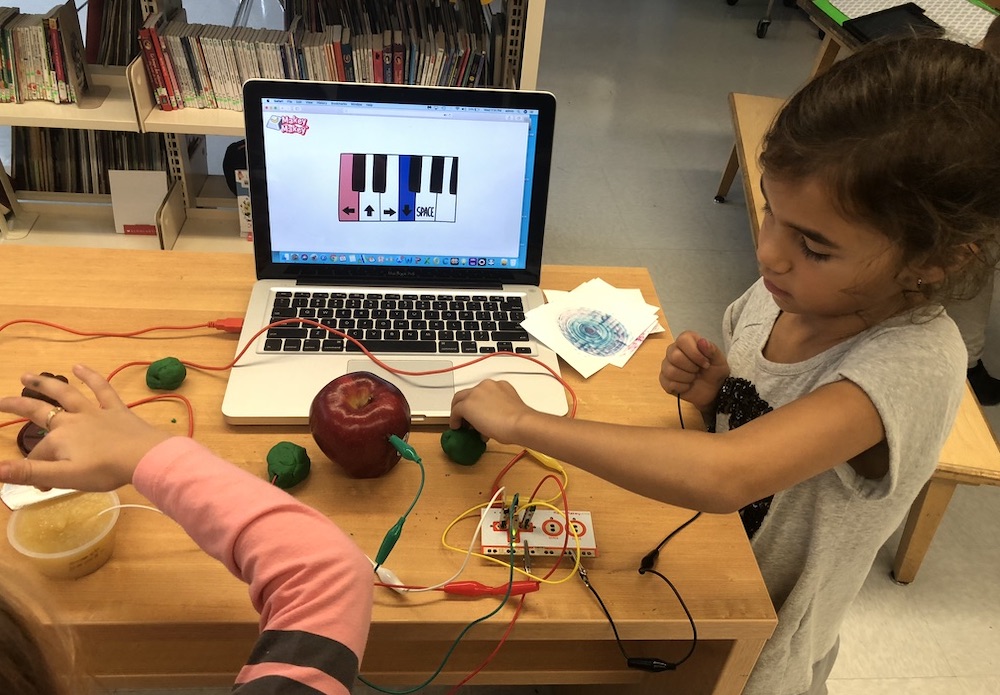
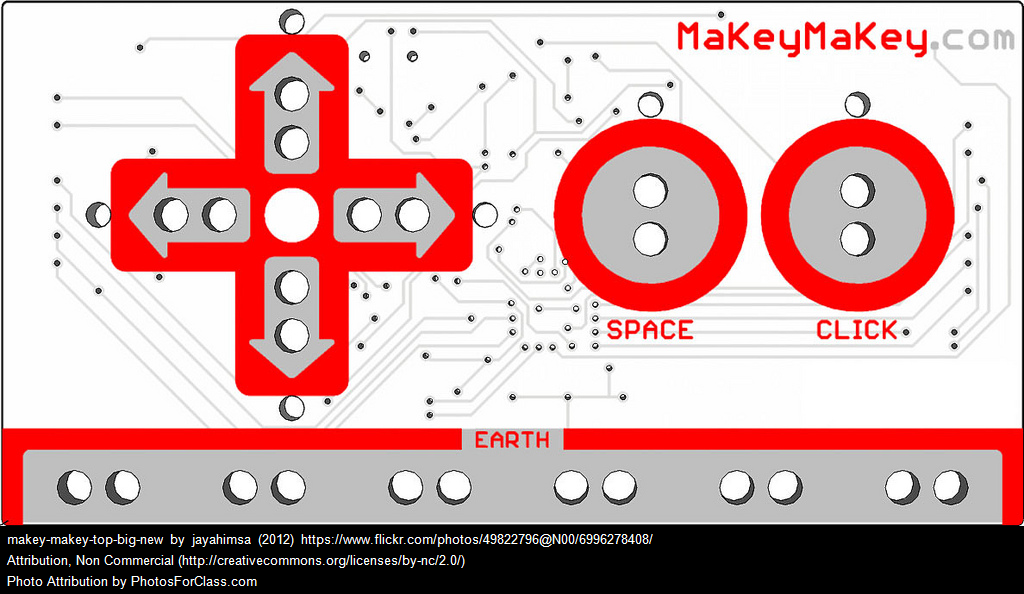 The Makey Makey is a microcontroller that lets you connect to everyday objects. It has a simple interface for connecting conductive materials (like bananas, water, tin foil, etc.) to basic functions on a computer's keyboard. There is also a reversible side that contains many more ports so you can expand into more advanced circuit-based projects. Great for demonstrating how conductivity works with young children.
- Getting Started - Go to site![]()
- Makey-Makey Classic Hook-Up Guide - Go to site![]()
- Projects and Tutorials - Go to site![]()
- Educator Guides and Sample Lessons - Go to site![]()
Peripherals
Silhouette Curio and Cameo
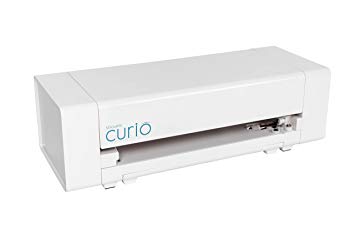
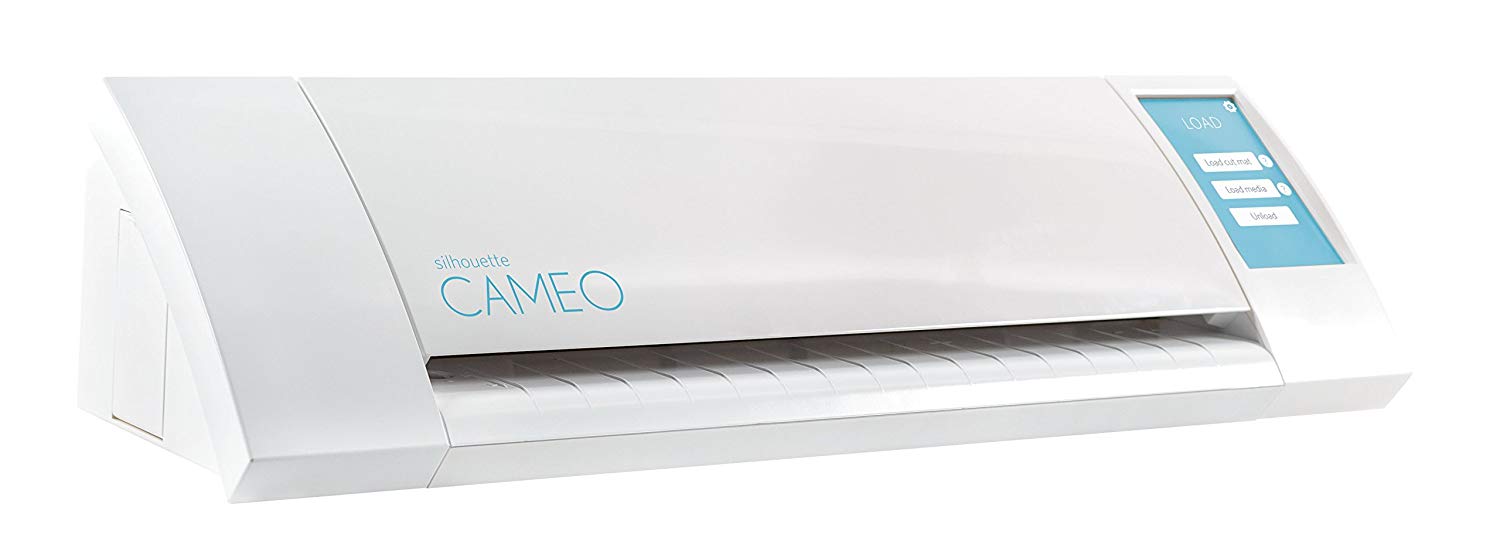 The Silhouette Cameo is an electronic cutting machine that can work with a wide variety of materials, from vinyl to fabric. Using Silhouette's software, you can import images, manipulate and alter them, and cut your design using the many different cutting tools available. The Curio is a larger version that provides more width and depth to your canvas.
- Software (Computers only) - Go to site![]()
- First Steps - Go to site![]()
- Tutorials - Go to site![]()
Embroidery Machine Software
 Beyond the Silhouette cutters, there are other embroidery machines you may be using. Turtlestitch is an easy-to-learn software that is compatible with many embroidery machines and which uses block programming to code designs. Perfect for making complex embroidering patterns and learning about programming.
- TurtleStitch (Online only) - Go to site![]()
3D Printers
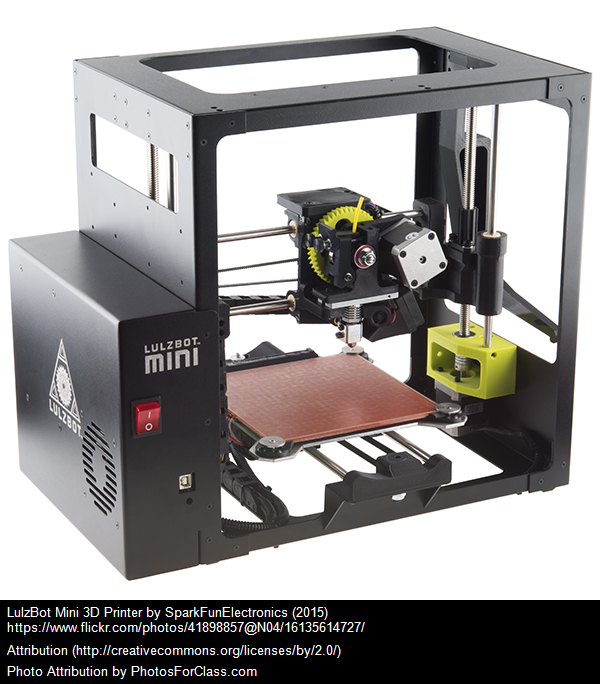 3D Printers come in all shapes and sizes. They are promising and versatile machines and are best used for printing unique designs that solve specific problems. There are many different programs that can be used but educators in Quebec can acquire a free copy of SketchUp Pro (ask your local RECIT).
- General Information - Go to site![]()
- SketchUp Pro Software (Computers only) - Go to site![]()
- LEARN Resources - Go to site![]()
Electronic Circuit Kits
littleBits
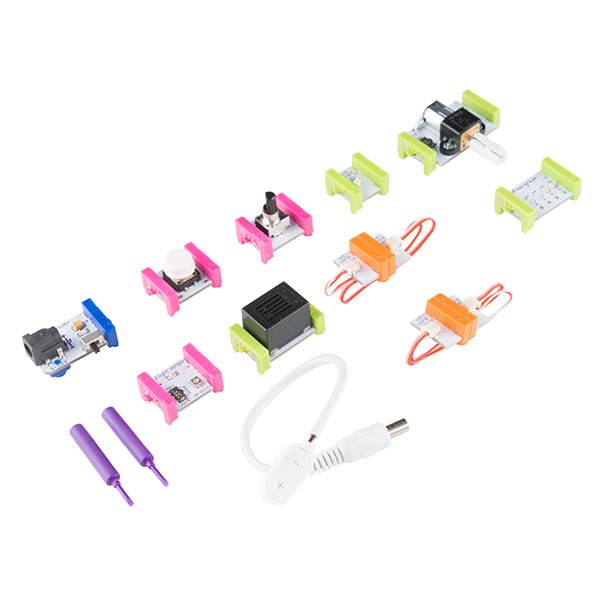 littleBits are electronic building blocks that can be snapped together to turn on lights, make sounds and music, and to power motors and fans. They are intuitive and simple to use and are great for experimentation. They are sold as a kit and all the pieces are powered by a simple 9V battery.
- Intro Video - Go to site![]()
- First Steps - Go to site![]()
- Projects - Go to site![]()
littleBits Synth Kit
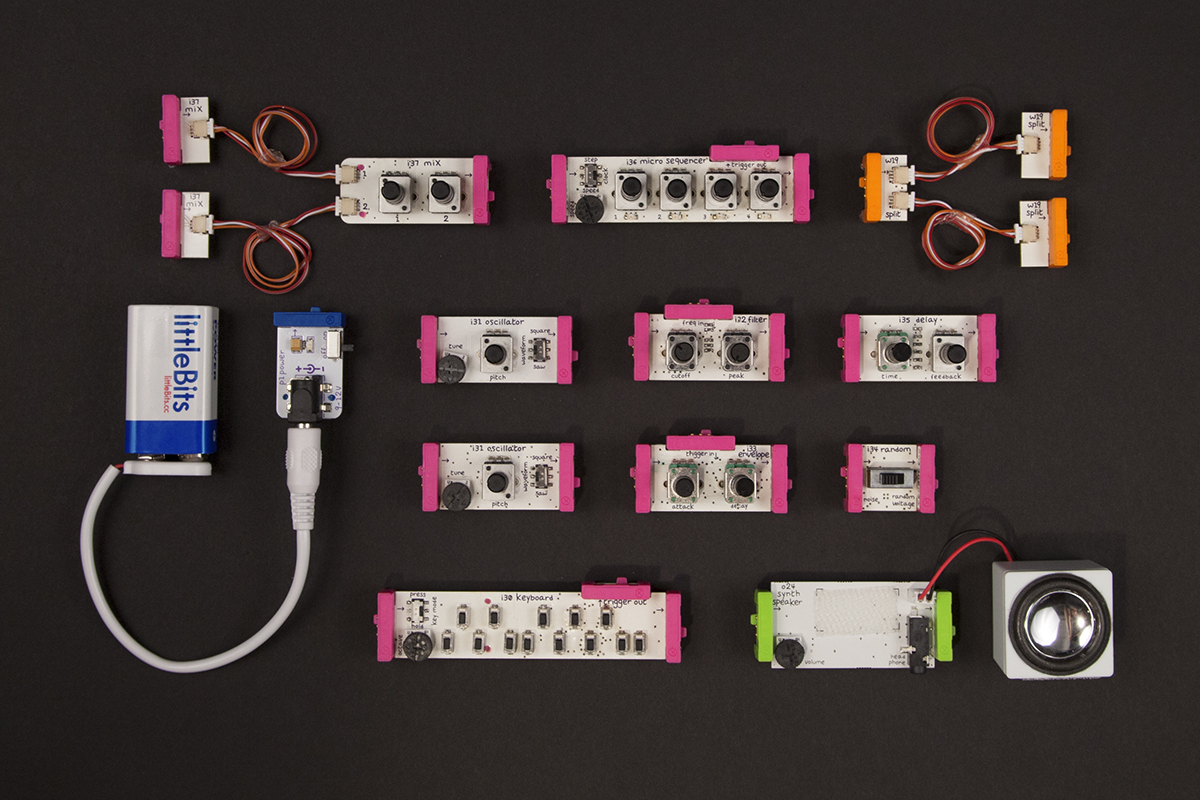 littleBits have designed a kit that contains a coding block that can be modified and controlled by other littleBits. There are many other types of kits that are designed for different projects and activities, from music-making to robotics.
- First Steps - Go to site![]()
- Tutorials - Go to site![]()
- Going Further - Go to site![]()
Squishy Circuits
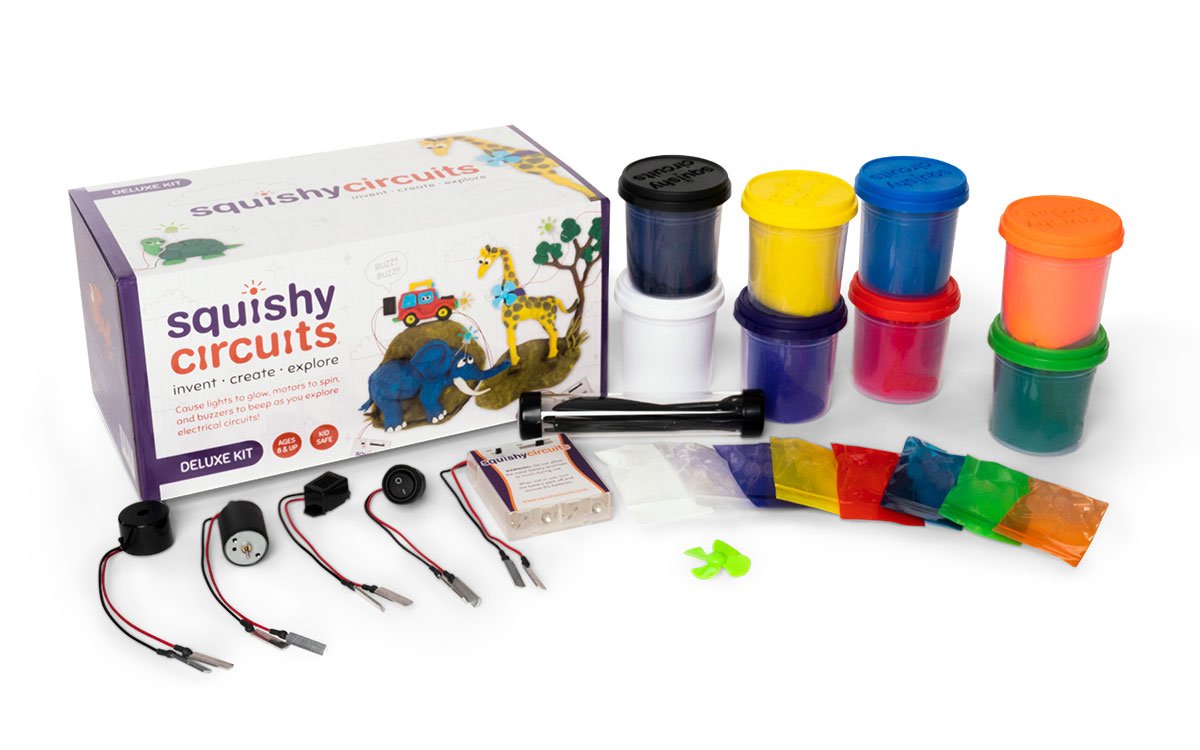 Squishy Circuits are great for introducing younger students to basic circuitry and the difference between conductive and non-conductive materials. Power motors, buzzers, and lights with the power of play dough.
- First Steps - Go to site![]()
- Tutorial - Go to site![]()
- Going Further - Go to site![]()
 FACEBOOK
 TWITTER
 INSTAGRAM
 LINKEDIN